


Установка цифровой приборной панели Volkswagen Lavida 2013-2017: руководство по модернизации из 17 шагов
Установка цифровой панели приборов Volkswagen Lavida 2013-2017 с реальными шагами 17
Это Установка цифровой панели приборов Volkswagen Lavida 2013-2017 Руководство охватывает полный маршрут модернизации на платформе PQ с 17 реальными шагами установки, переносом оригинальной платы, проверками вспомогательной платы, прокладкой USB, калибровкой и финальным тестированием.
Руководство основано на фактических фотографиях установки Lavida от iKAGOO, технических видео и процедуре послепродажного обслуживания. Оно предназначено для автомобилей, которые всё ещё используют соответствующую оригинальную механическую панель приборов.
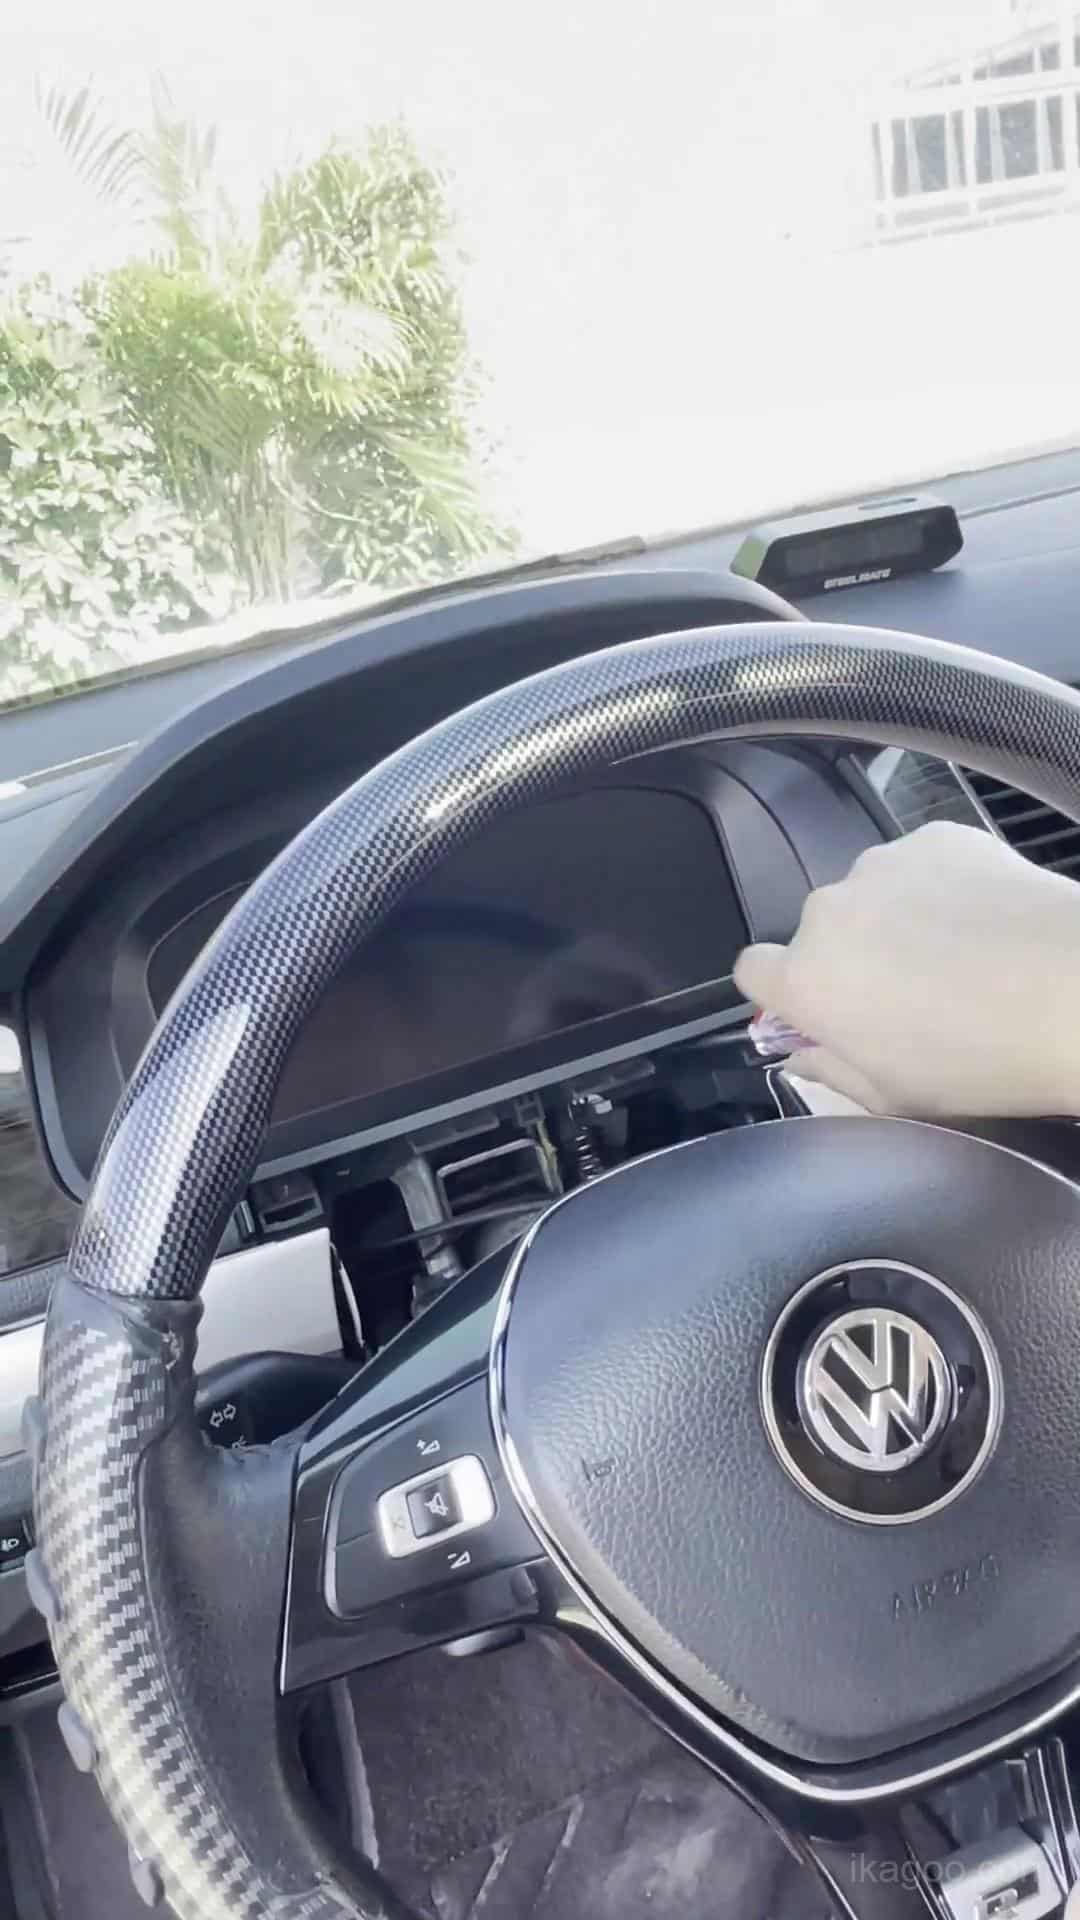
Как работает установка цифровой панели приборов Volkswagen Lavida 2013-2017?
Краткий ответ: сначала подтвердите оригинальную механическую панель, завершите подготовку оригинального меню предупреждений, снимите панель, перенесите необходимую оригинальную электронику на чистый стенд, проверьте опциональную вспомогательную плату, соберите цифровую панель, проложите оба USB-кабеля и протестируйте систему перед повторной установкой отделки приборной панели.
Работа не завершена, когда дисплей впервые включается. Может всё ещё потребоваться калибровка топлива, настройки Physical Light, выбор модели автомобиля и финальные проверки предупреждений/дисплея.
Совместимость цифровой панели приборов Volkswagen Lavida 2013-2017
Используйте этот маршрут установки, когда
- Автомобиль — Volkswagen Lavida 2013-2017.
- Оригинальная приборная панель использует соответствующую механическую панель платформы PQ.
- Форма оригинальной панели соответствует приведённым ниже справочным материалам по установке.
- Автомобиль не был переоборудован под другую архитектуру панели.
Остановитесь и сначала проверьте, когда
- Оригинальная панель приборов выглядит иначе, чем на справочных фотографиях.
- Панель или приборная панель уже были модифицированы.
- Предыдущая установка нештатной проводки изменила маршрут подключения приборной панели.
- Вы не можете определить исходную архитектуру комбинации приборов.
Важный: “plug-and-play” означает, что поддерживаемая установка не требует резки или сращивания штатного жгута проводов автомобиля. Снятие панели приборов, перенос штатных компонентов, прокладка USB-кабеля и калибровка по-прежнему являются частью установки.
Инструменты и подготовка перед установкой
Основные инструменты
- Инструменты для отделки пластика
- Подходящие отвёртки
- Чистый мягкий верстак
- Индикатор исправной работы
Электронная обработка
- Сначала снимите статический заряд
- Держите печатные платы за края
- Не прикасайтесь к компонентам напрямую
- Никогда не нажимайте на ЖК-дисплей
Перед закрытием панели приборов
- Проверьте все разъемы
- Держите оба USB-кабеля под рукой
- Выполните первое включение и проверку
- Закрывайте отделку только после успешного прохождения проверки
Не снимайте оригинальный зуммер прибора. Это часть сохранённого маршрута штатного оборудования, и его следует оставить установленным.
Порядок установки цифровой комбинации приборов Volkswagen Lavida
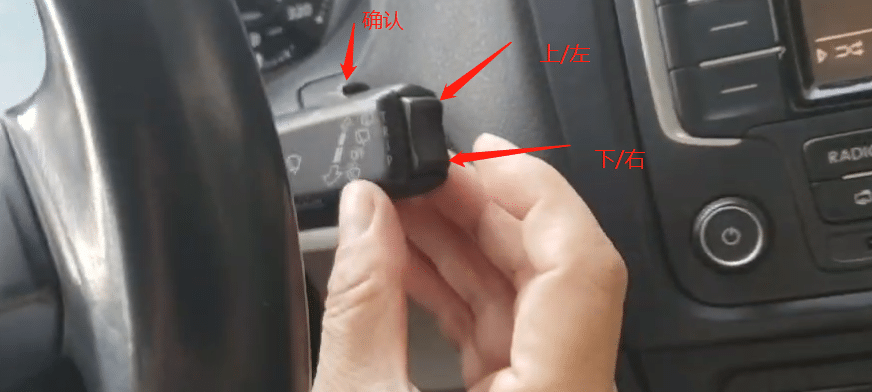
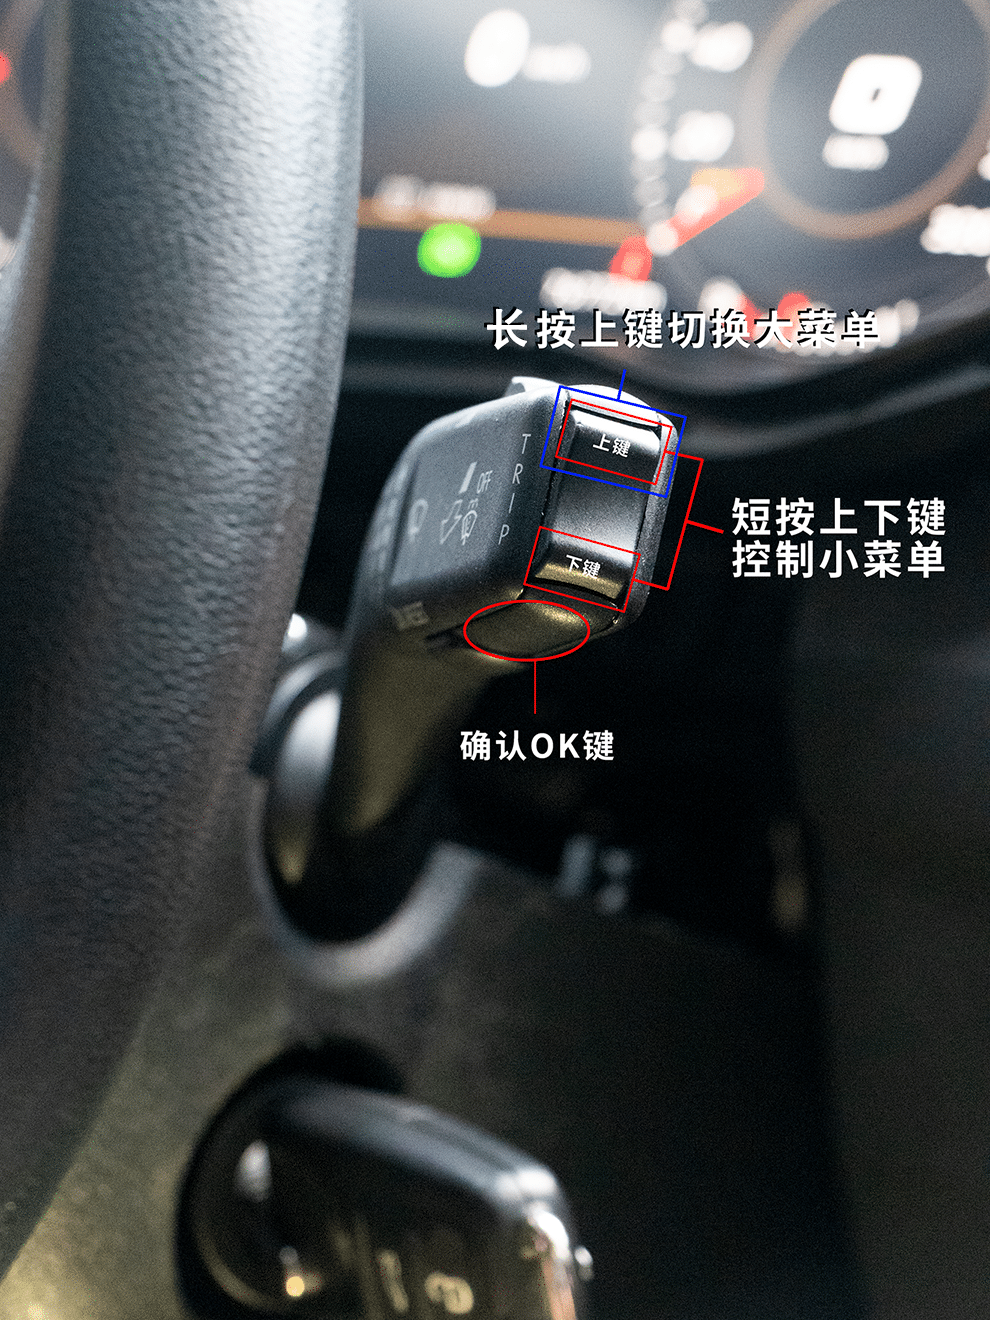
Завершите настройку предупреждений до снятия
Сделайте это, пока штатная механическая комбинация приборов всё ещё установлена и работает.
- Установите предупреждение о зимних шинах до максимально доступного значения.
- Установите предупреждение о превышении скорости до максимально доступного значения.
- Войдите в многофункциональное меню ограничения скорости.
- Переключение обеих функций предупреждения выключите.
- Только после этого начинайте снимать штатную комбинацию приборов.
Проверка завершения: оба маршрута предупреждений подготовлены, пока меню штатной комбинации приборов всё ещё доступно.
Снятие обшивки приборной панели и оригинального кластера
Первый физический этап — контролируемый доступ к панели приборов. Не протаскивайте комбинацию приборов через отделку, которая не была полностью освобождена.
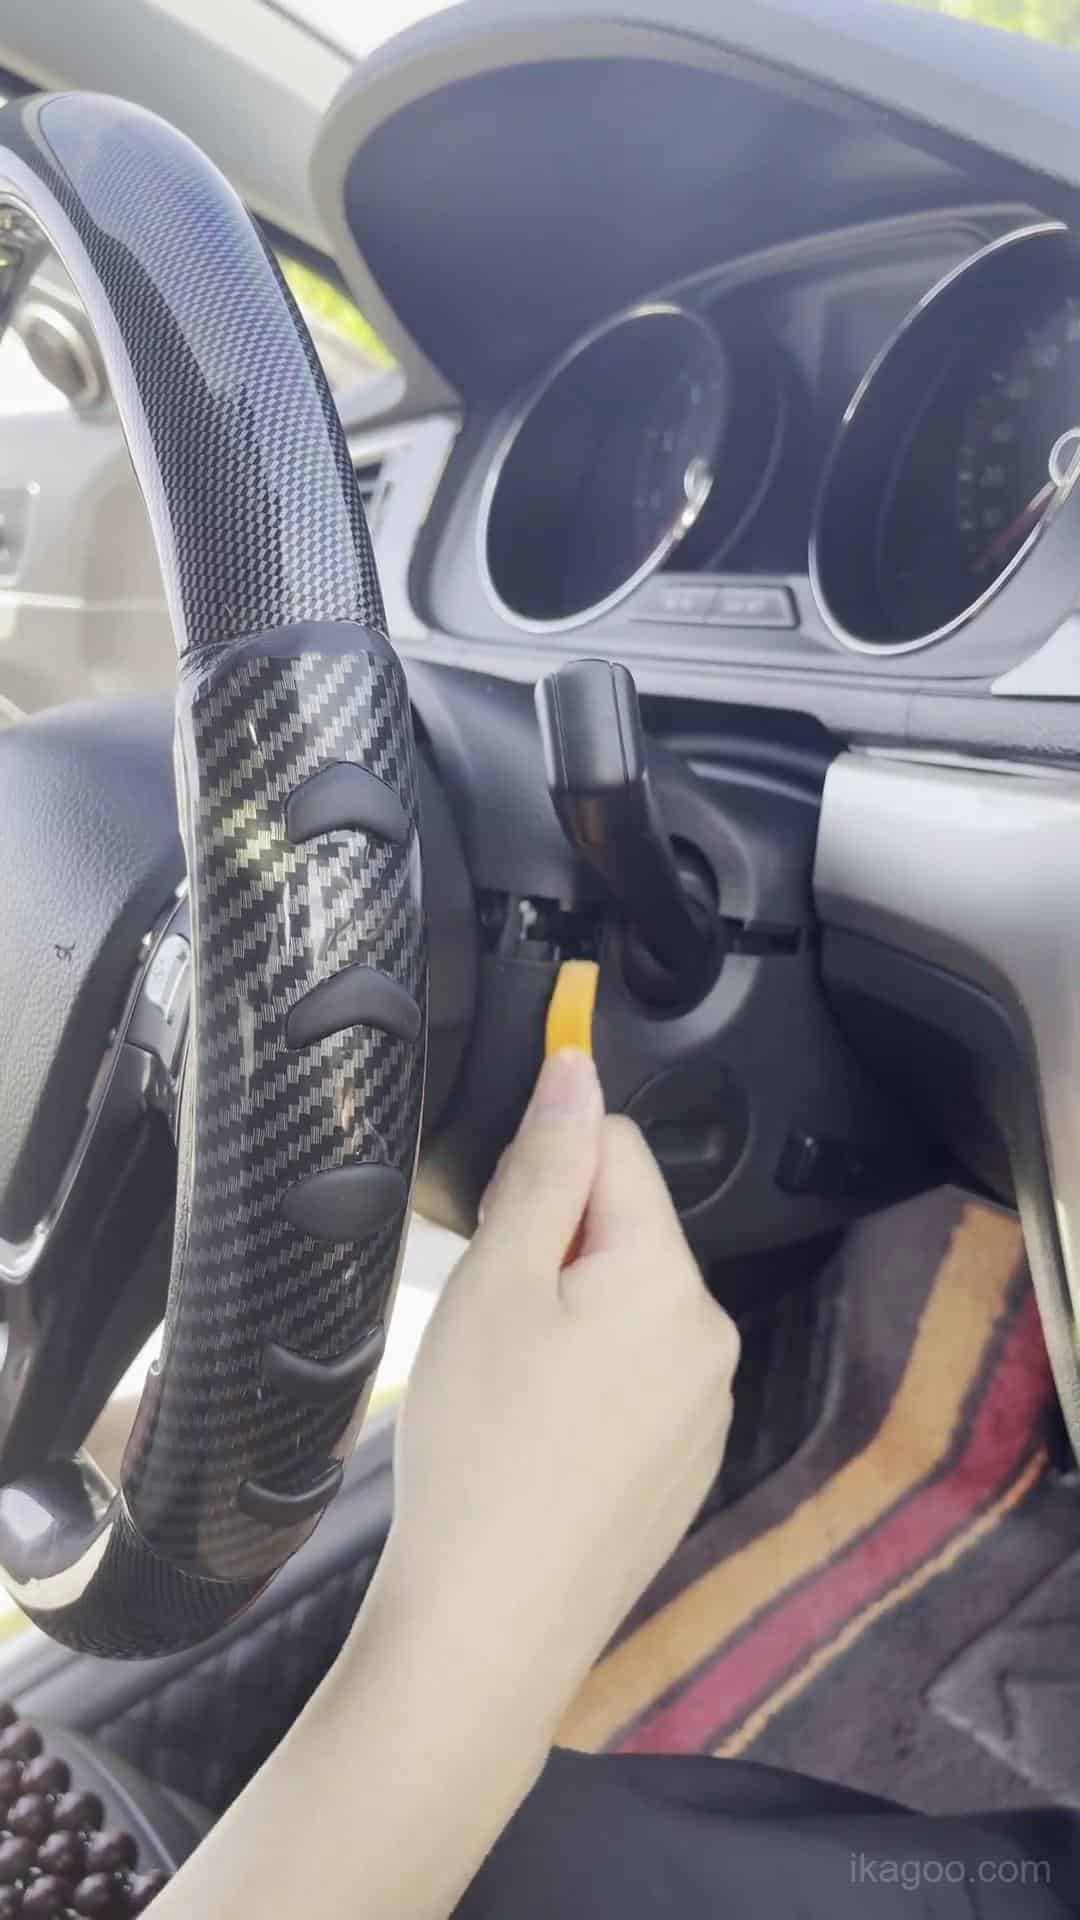
Шаг 1. Подтвердите наличие штатной механической комбинации приборов
Сравните лицевую панель штатной комбинации приборов, окружающую отделку панели приборов и проём для приборов с данным порядком установки, прежде чем что-либо снимать.
Сделайте чёткую фотографию штатной панели приборов и комбинации приборов перед началом работы. Это послужит полезной записью любых предупреждающих индикаций или существующего состояния панели приборов.
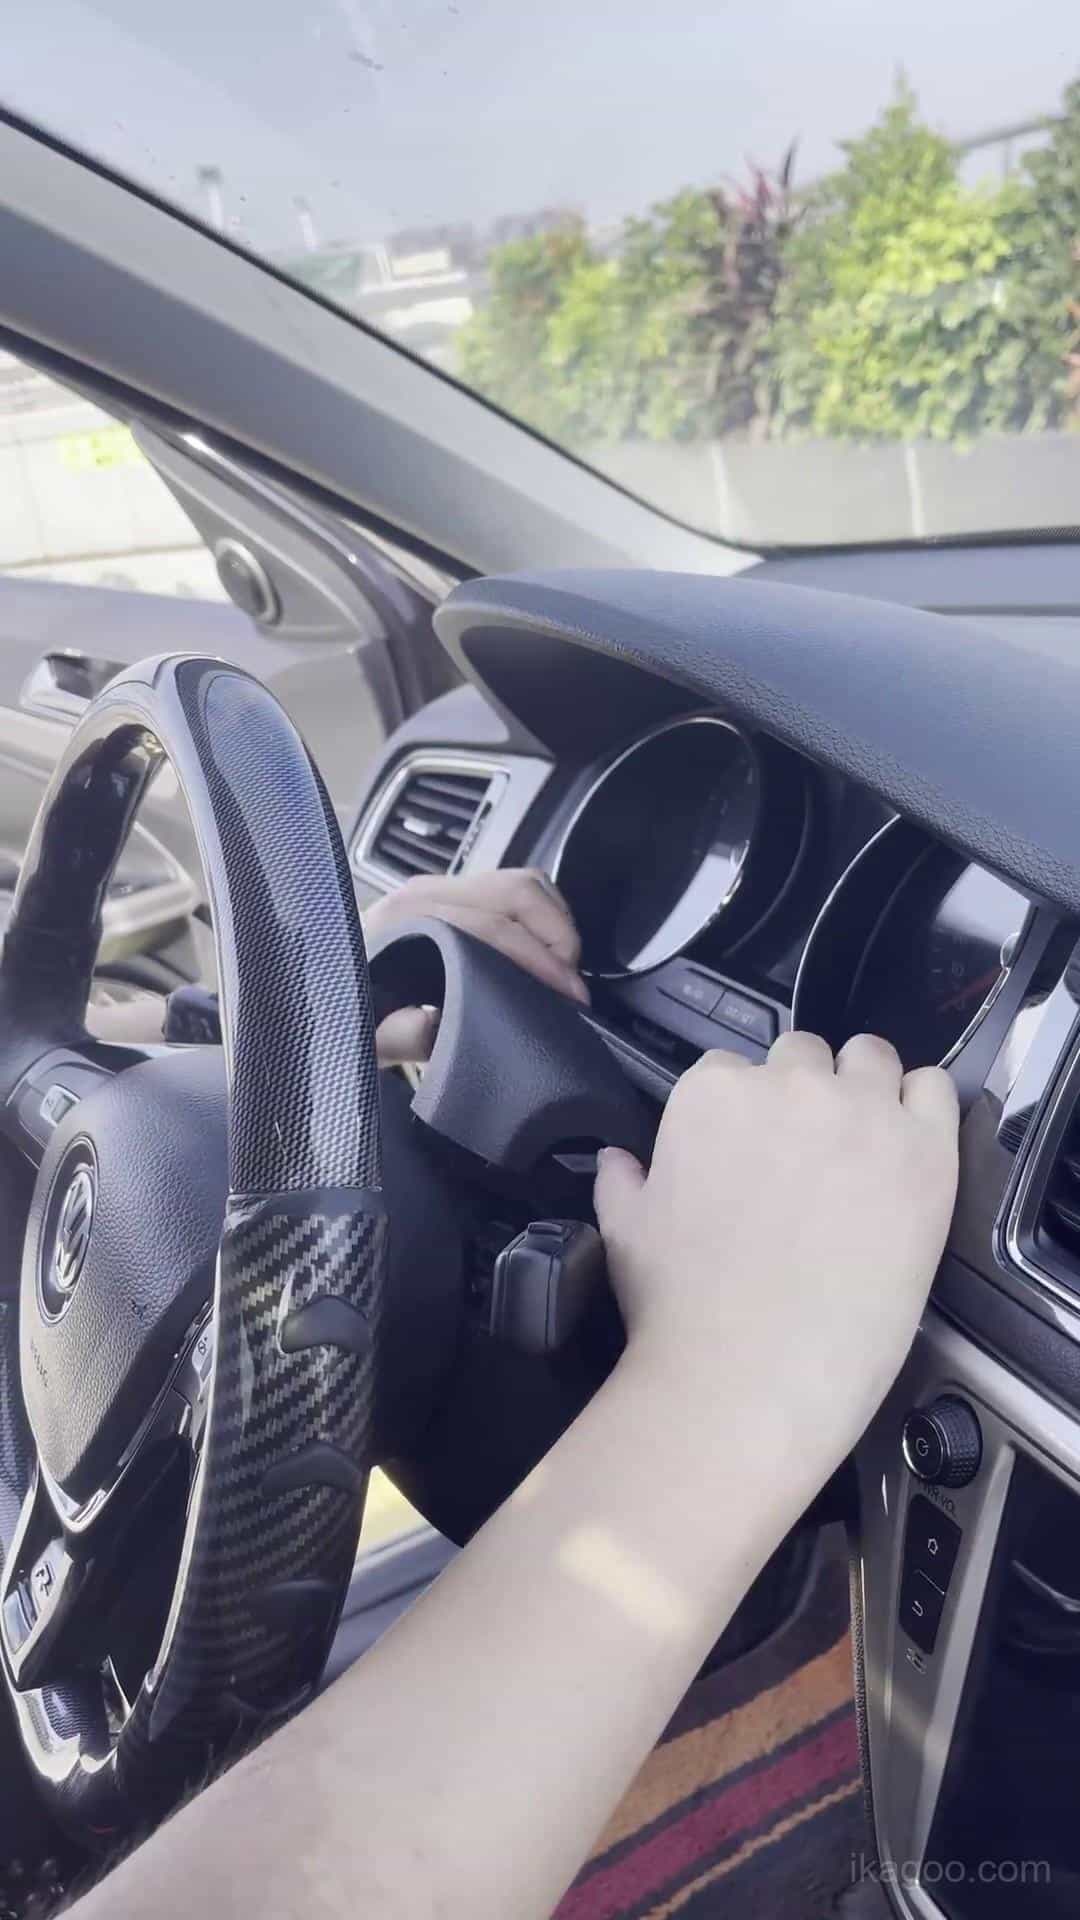
Шаг 2. Начните снятие декоративной накладки панели приборов
Используйте пластиковый инструмент для снятия накладок и постепенно освобождайте окружающую панель. Работайте от стыков панели и точек крепления, а не прикладывайте большое усилие к видимым поверхностям накладки.
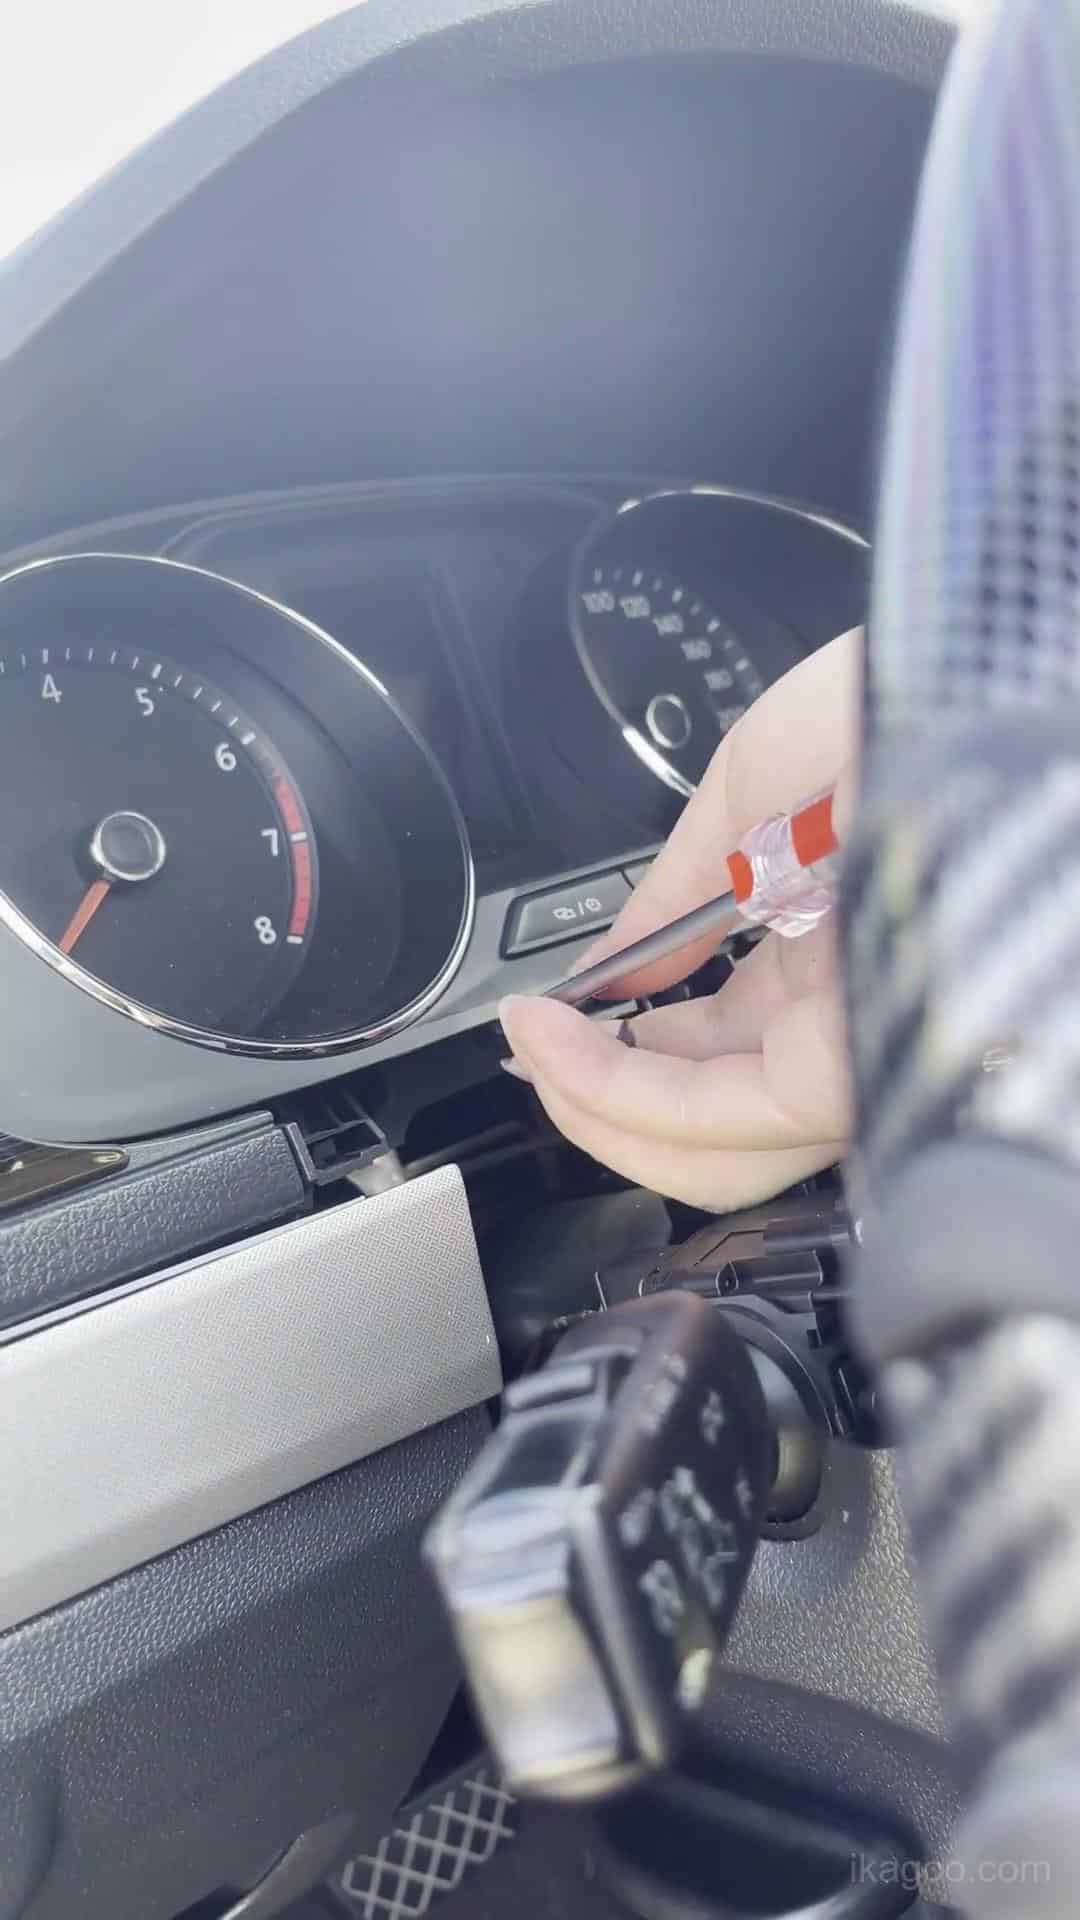
Шаг 3. Продолжите открытие обрамления комбинации приборов
Освобождайте окружающую накладку равномерно. Не оттягивайте одну сторону наружу, пока противоположная сторона остаётся прочно закреплённой.
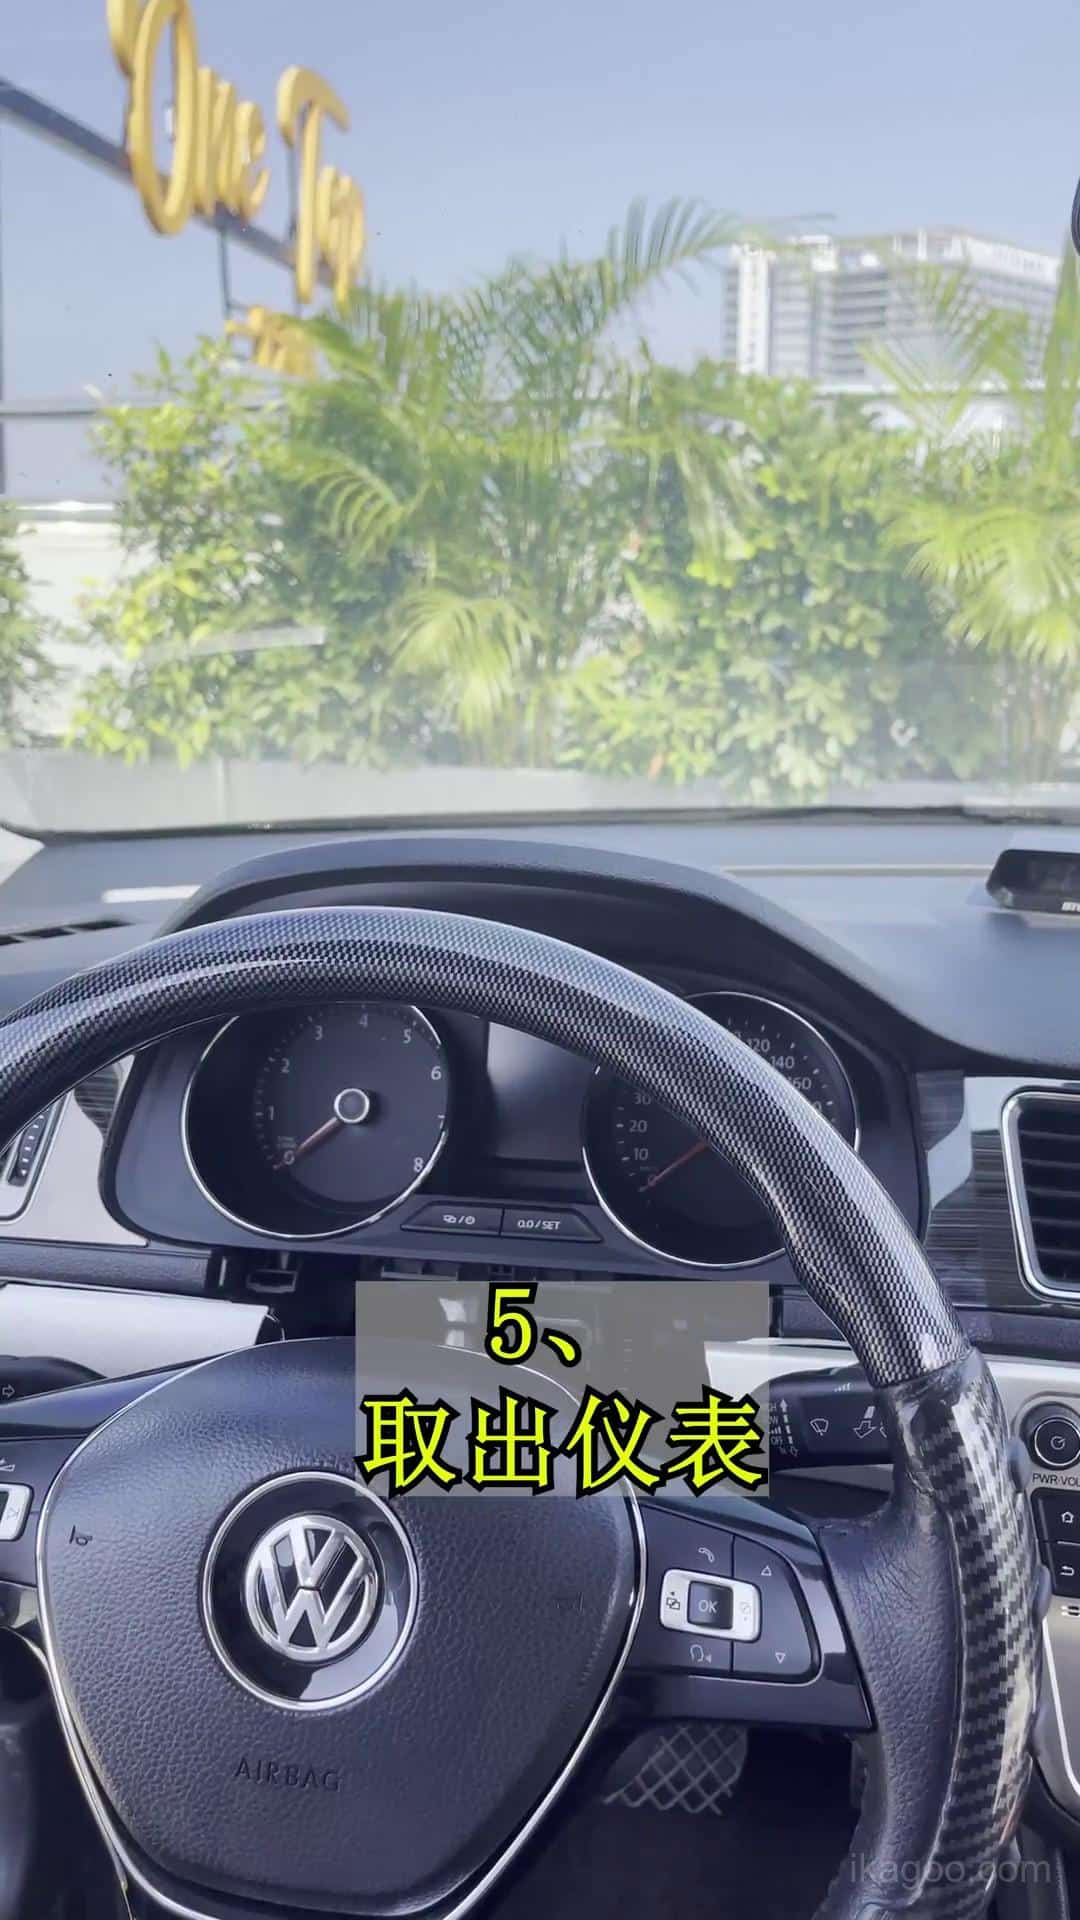
Шаг 4. Полностью раскройте исходный кластер
Освободите достаточно окружающей накладки, чтобы оригинальная комбинация приборов могла выдвинуться по своему обычному пути снятия без царапин и без принудительного воздействия на рамку.
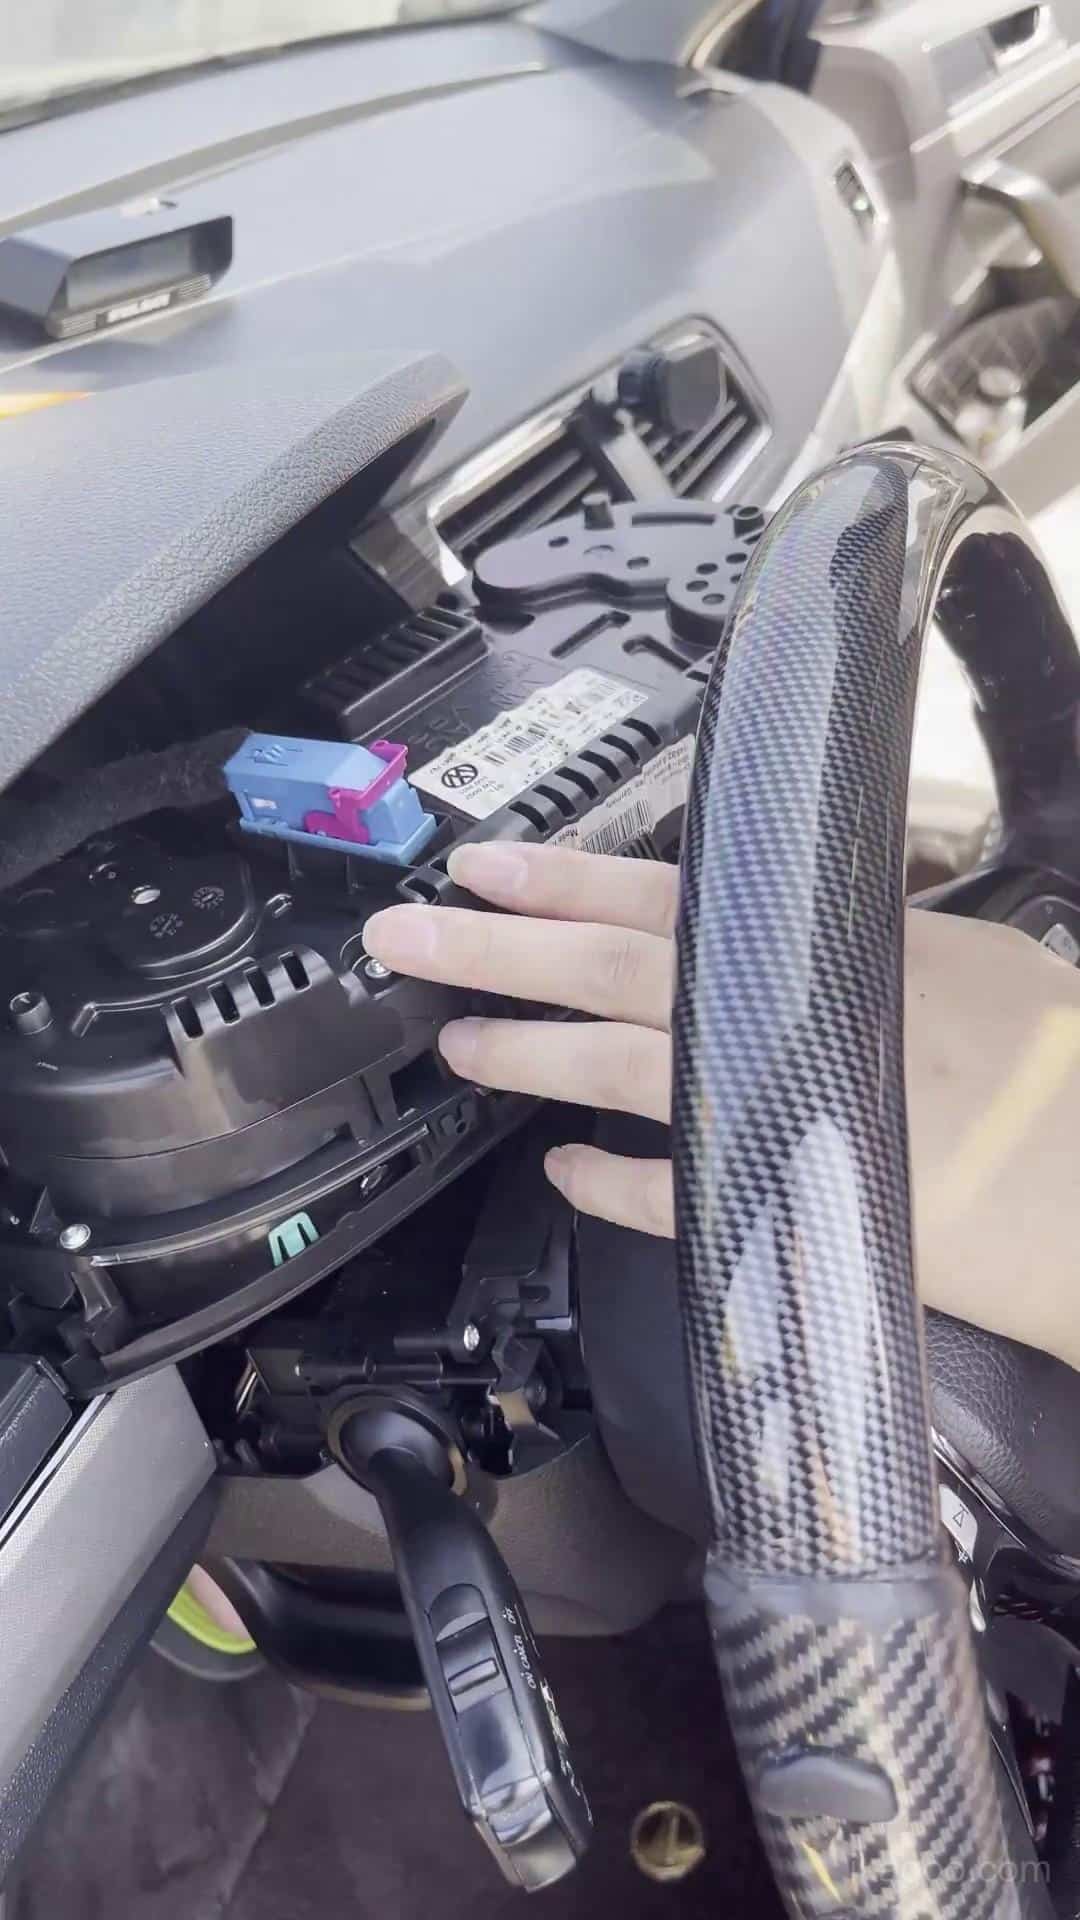
Шаг 5. Снимите оригинальный механический кластер
Осторожно выдвиньте комбинацию приборов вперёд и поддерживайте её вес при отключении оригинального разъёма. Не позволяйте комбинации висеть на жгуте проводов.
Перенос оригинальной платы и стендовые работы
Это самая чувствительная часть установки цифровой комбинации приборов Volkswagen Lavida 2013-2017, поскольку требуемая оригинальная электроника должна быть сохранена и установлена правильно.
Защита от статического электричества: снимите статический заряд с тела перед прикосновением к оригинальной печатной плате и держите электронные платы только за края.
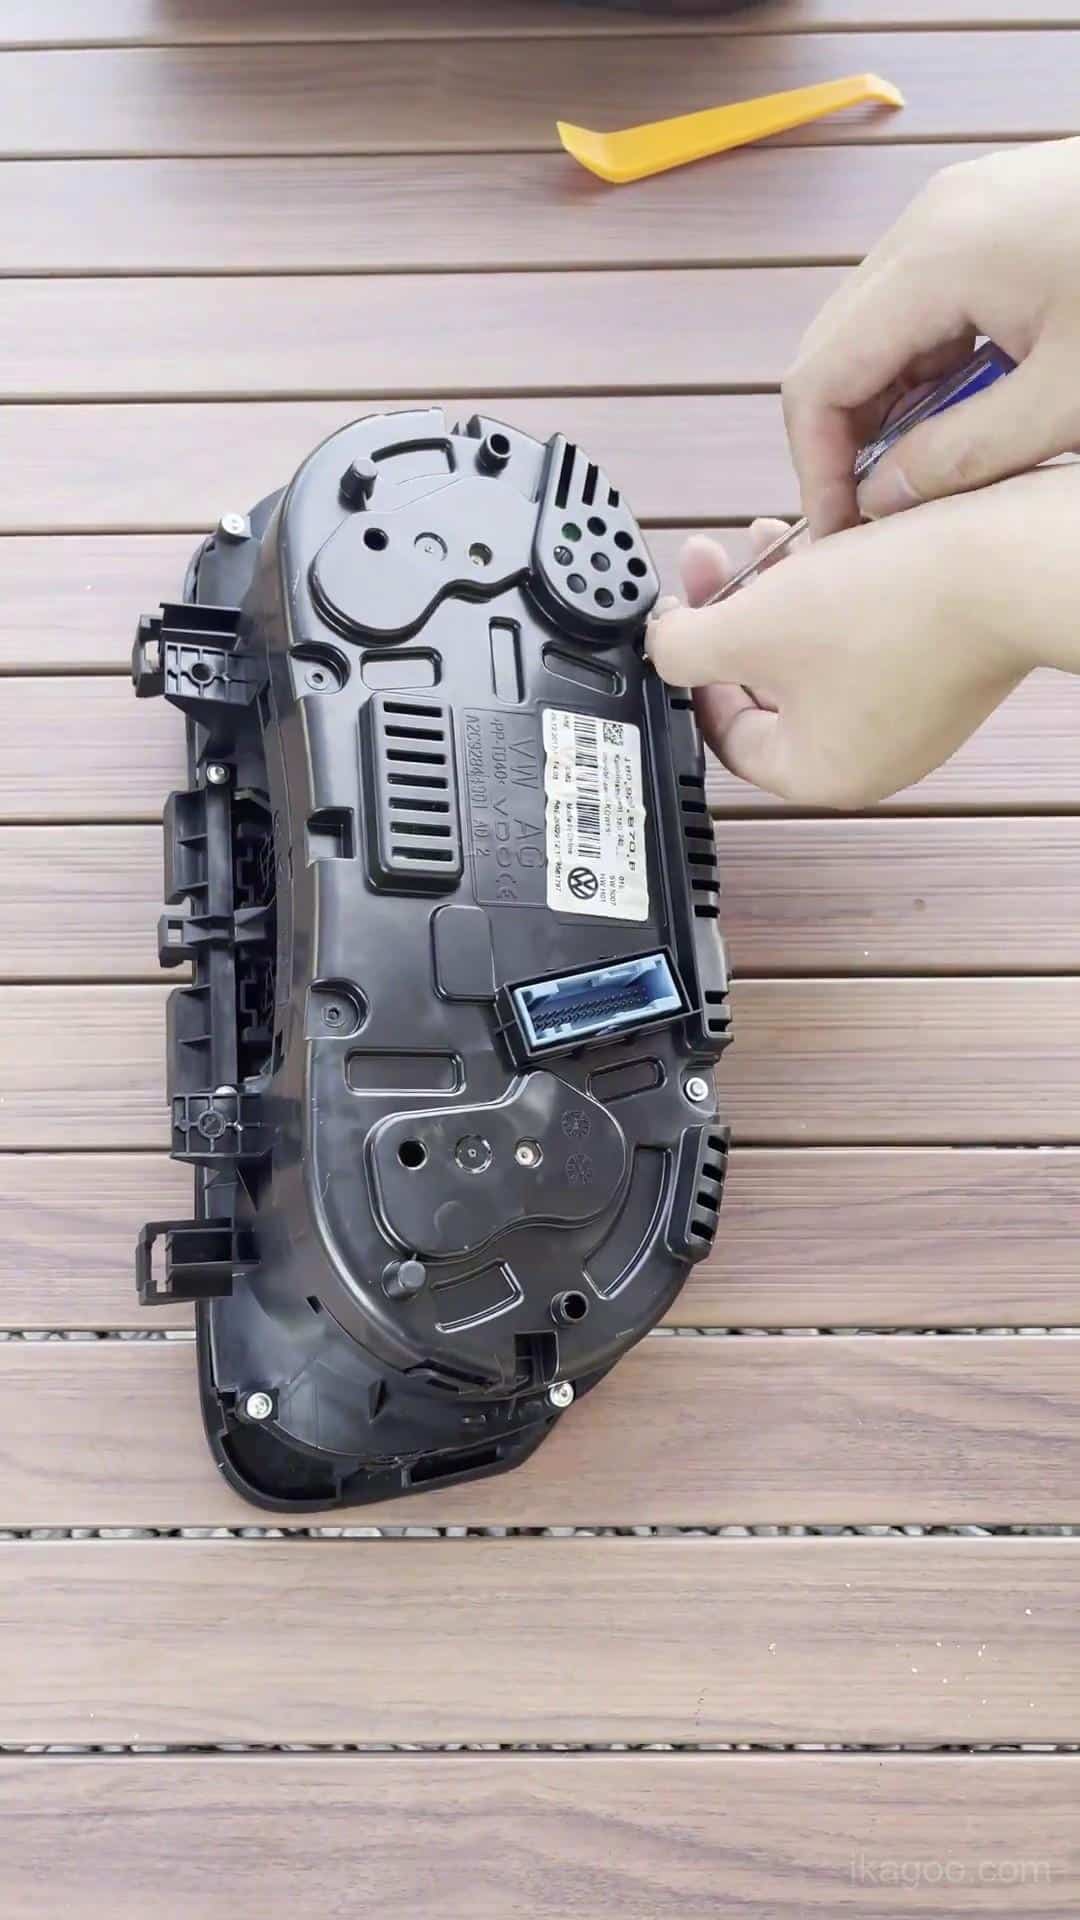
Шаг 6. Перенесите оригинальную комбинацию приборов на чистый стенд
Выполняйте внутренние работы на чистой мягкой поверхности. Организуйте снятые винты и компоненты перед открытием корпуса.
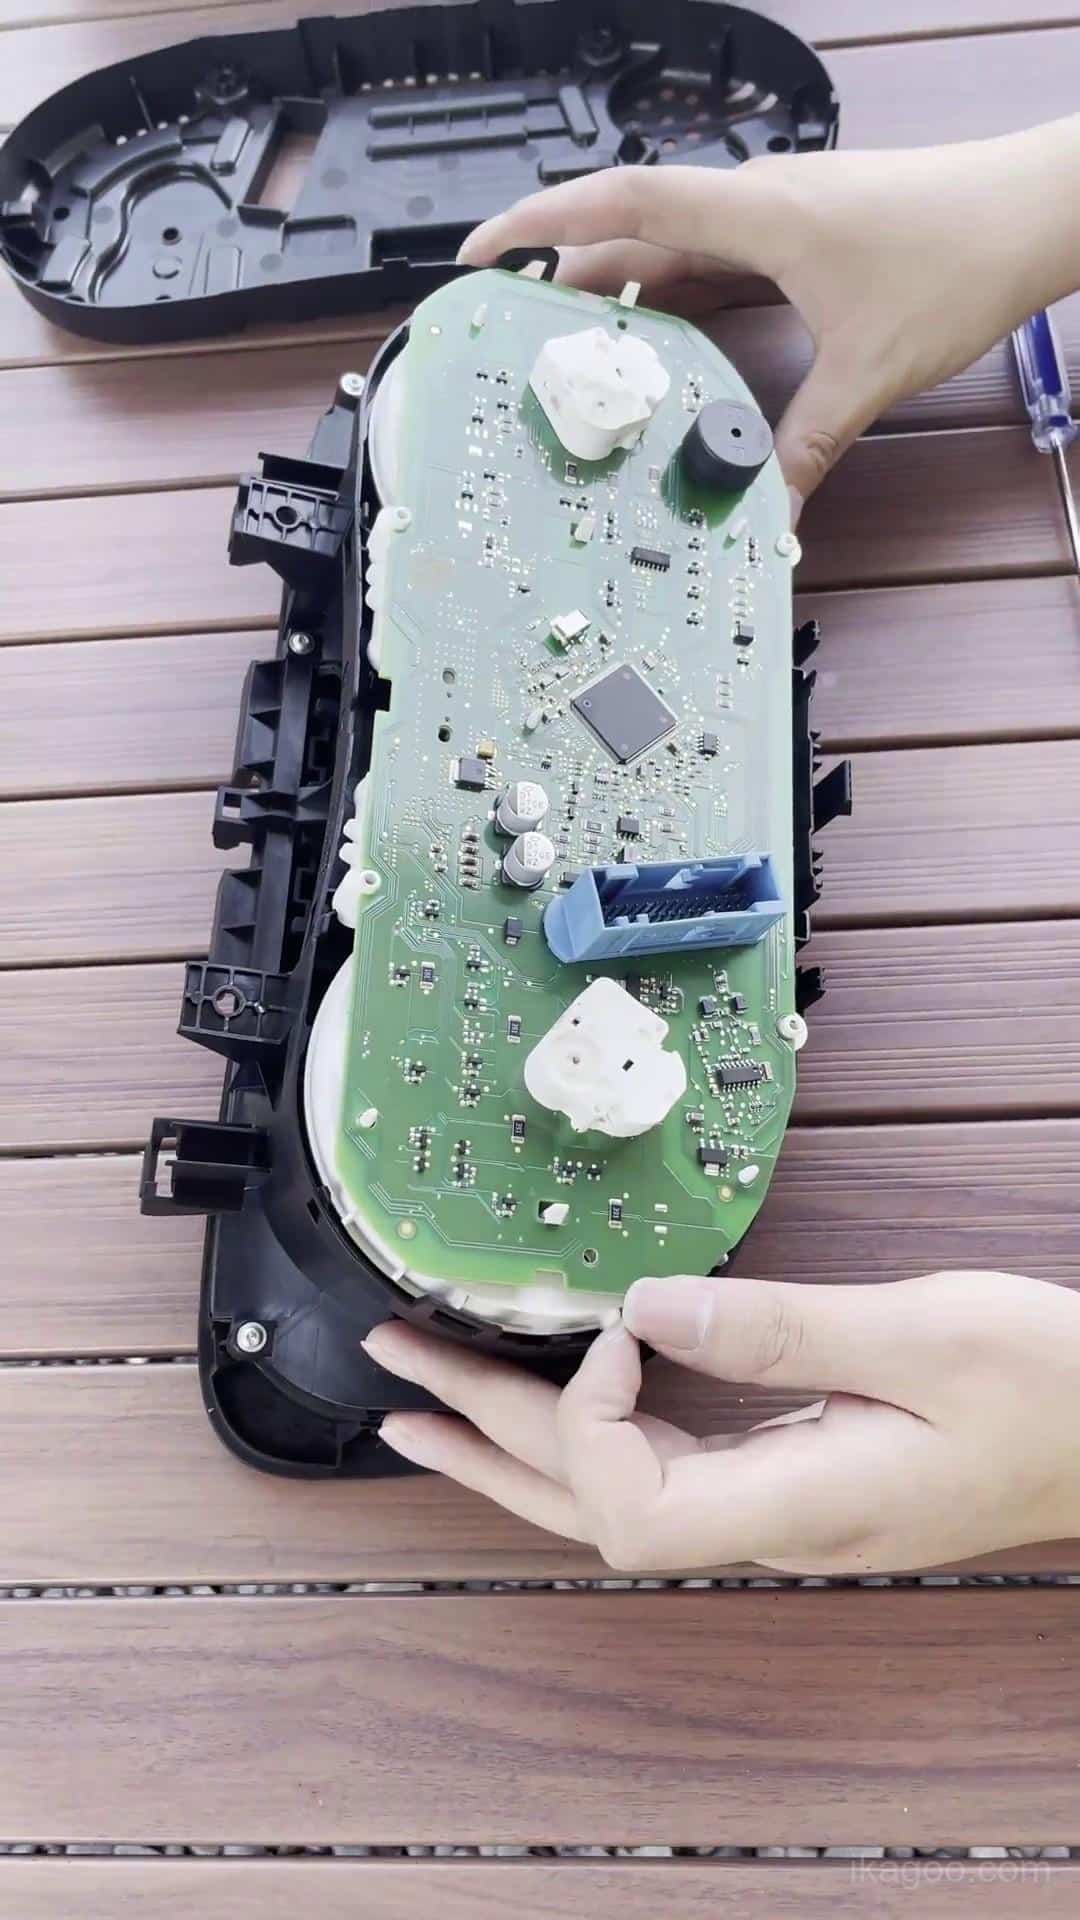
Шаг 7. Откройте оригинальный корпус панели приборов
Освобождайте защёлки и крепёж корпуса методично. Если корпус не разделяется естественным образом, найдите оставшуюся точку крепления, а не принуждайте его.
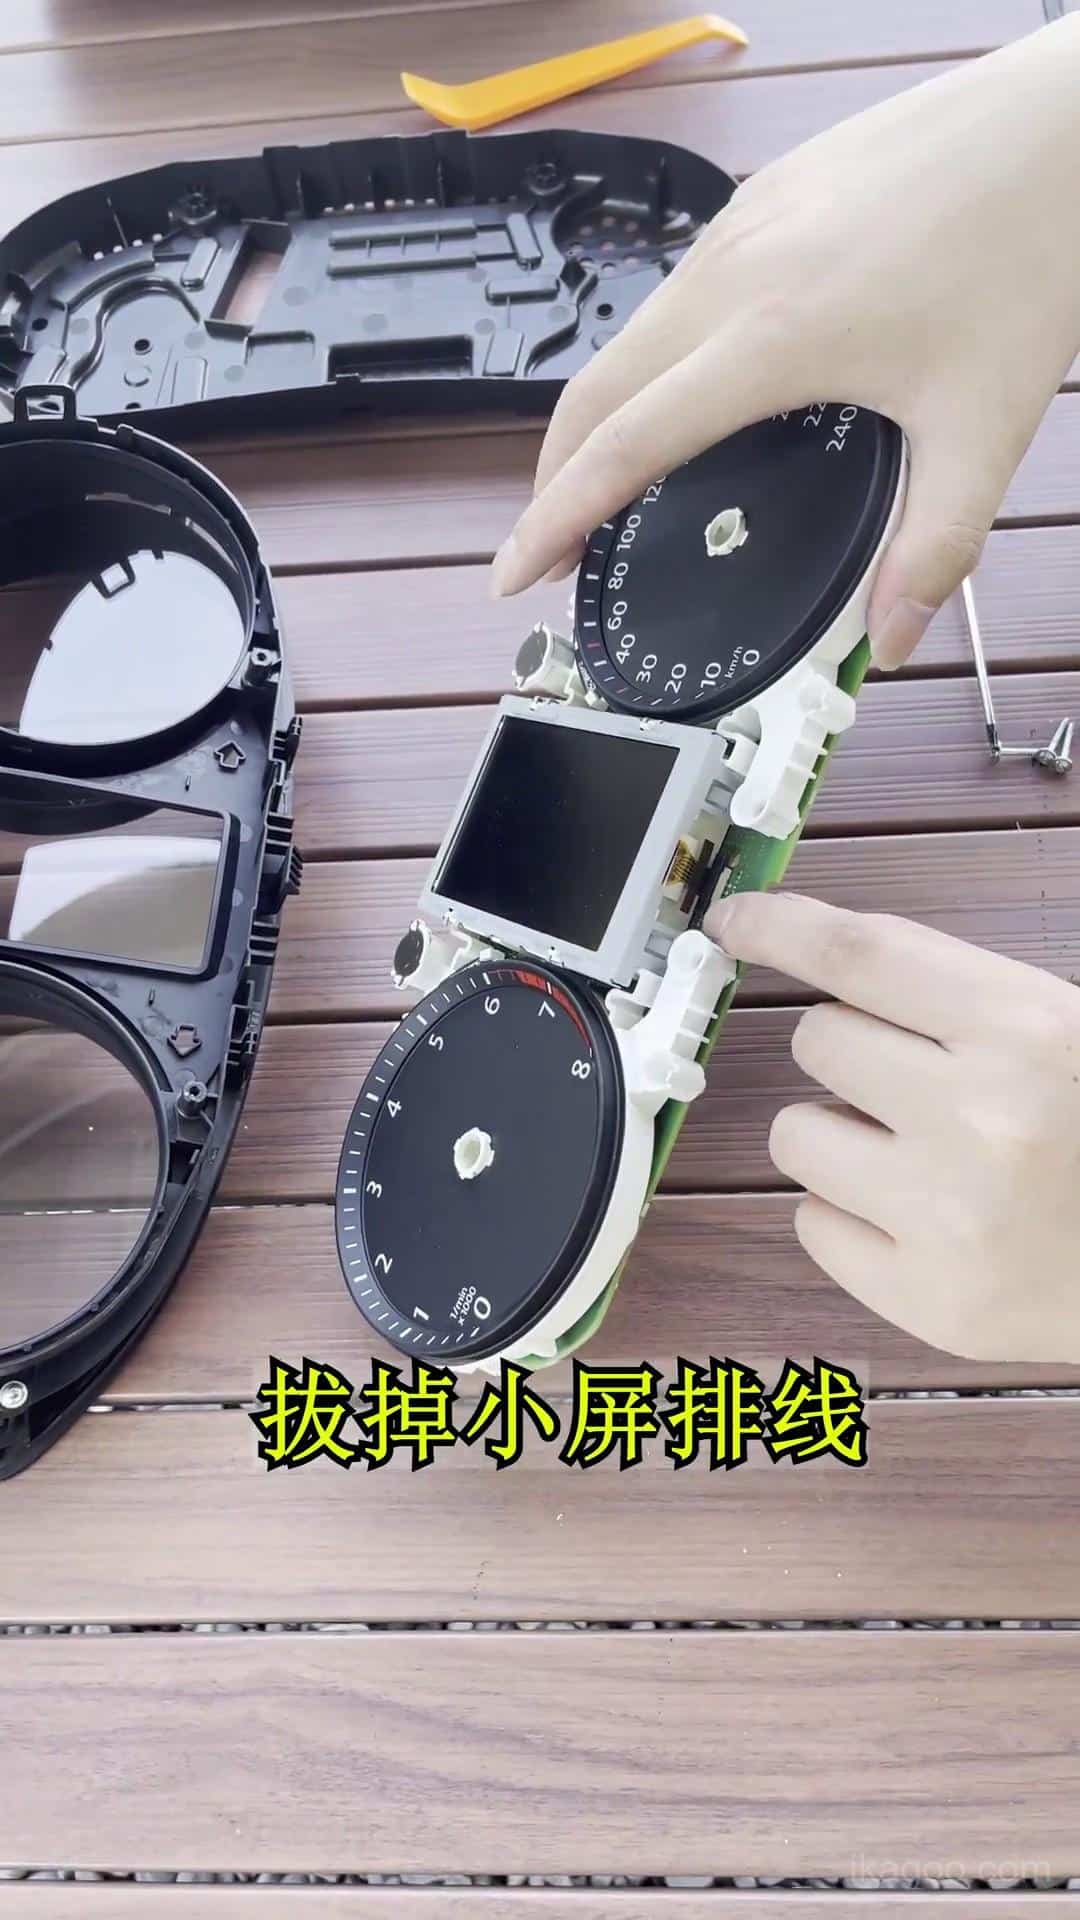
Шаг 8. Доступ к оригинальной электронике
Определите требуемый путь оригинальной платы перед отключением компонентов. Избегайте прямого прикосновения к компонентам печатной платы или открытым контактам.
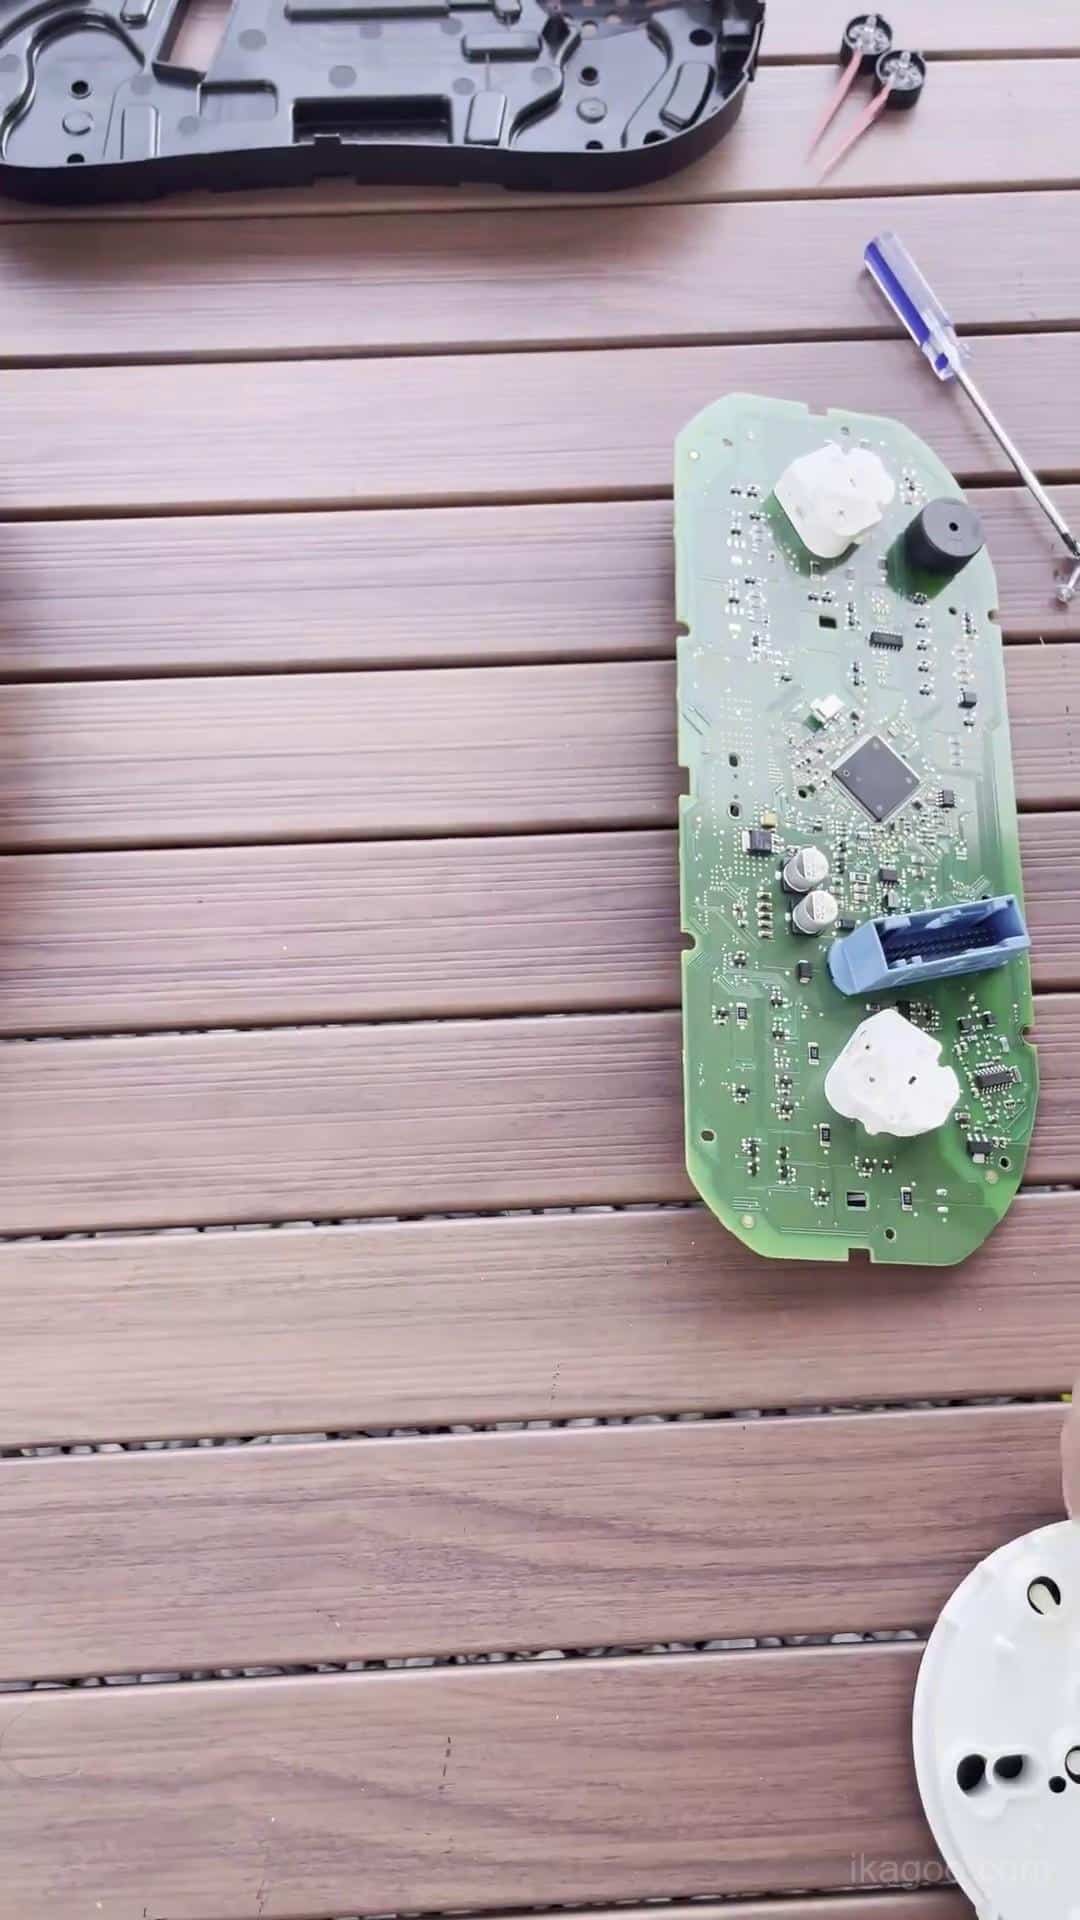
Шаг 9. Перенос требуемой оригинальной электроники
Переместите требуемые сохраняемые электронные компоненты в модернизированный цифровой блок комбинации приборов и расположите их естественно в предназначенных для них местах крепления.
Убедитесь, что все разъёмы полностью вставлены и ни один кабель не зажат под платой.
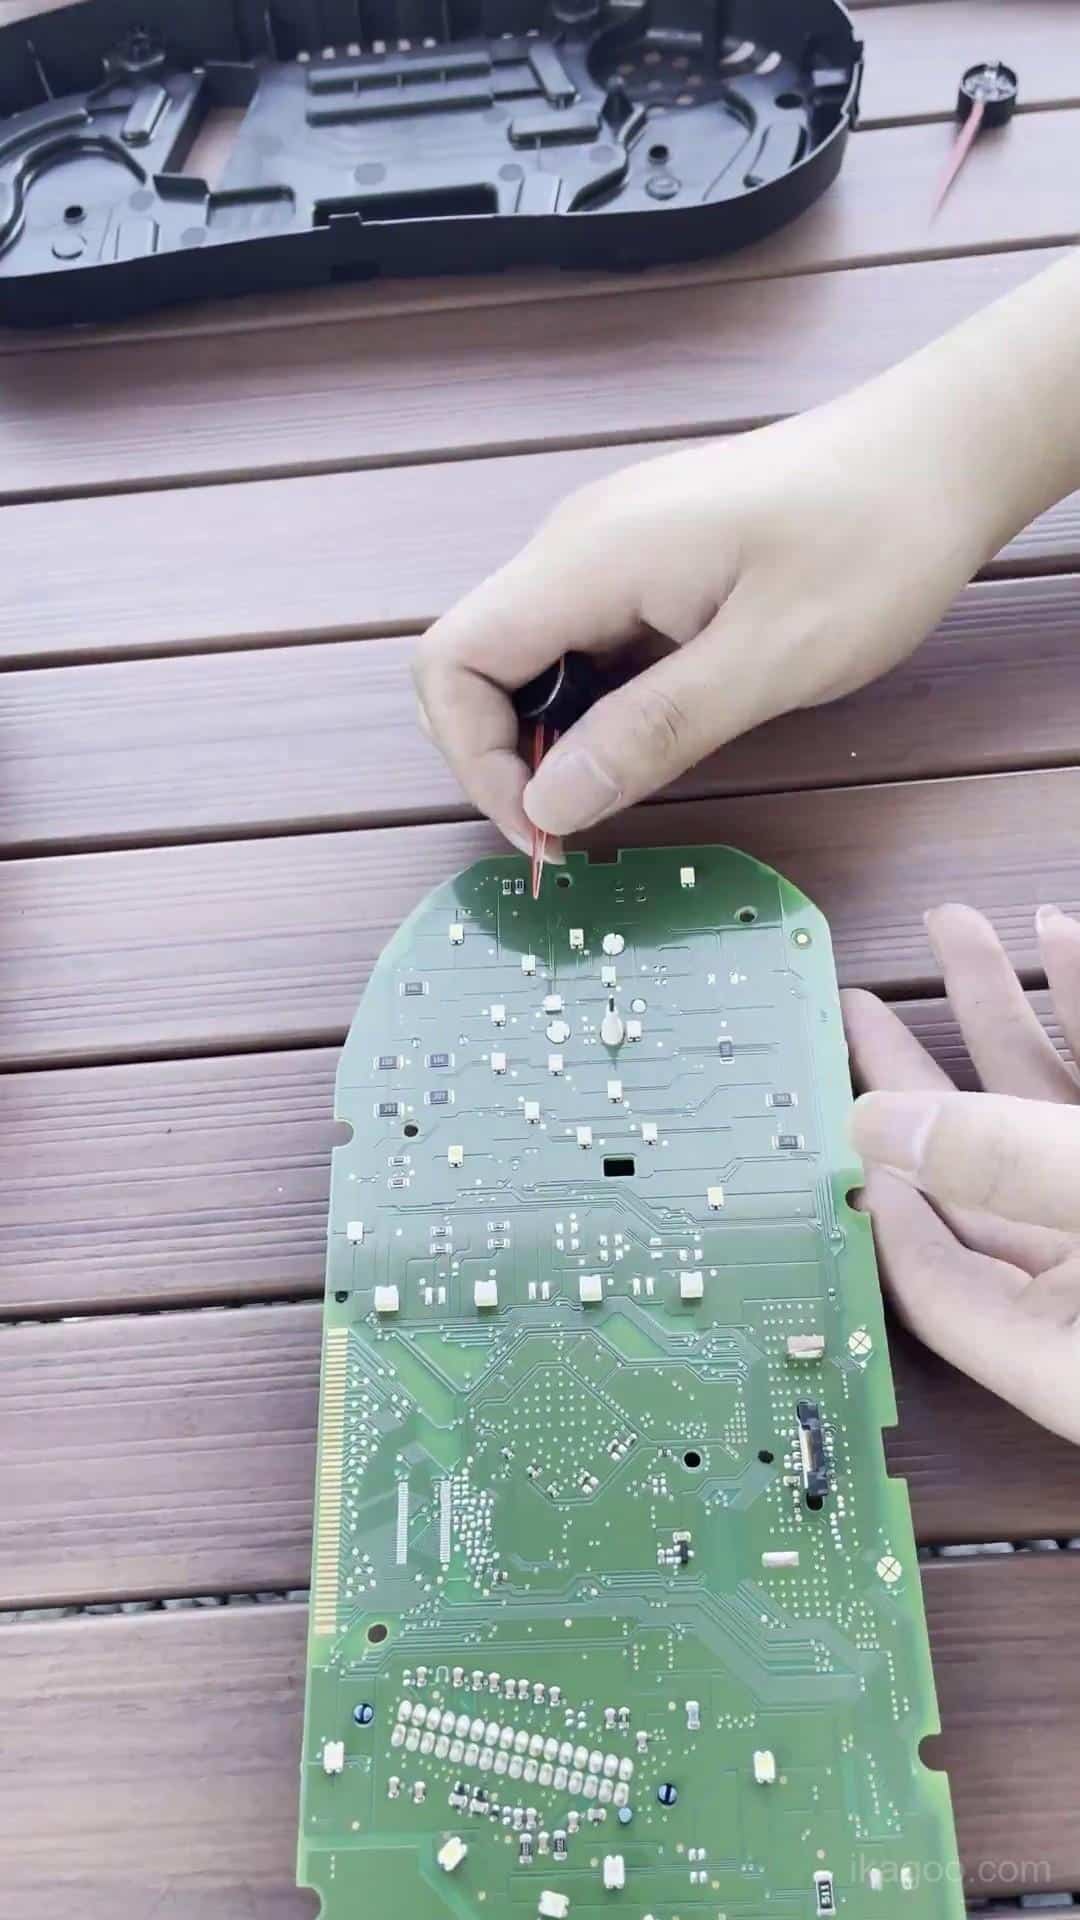
Шаг 10. Проверьте сохранённое оригинальное крепление
Перед закрытием нового корпуса осмотрите сохранённую плату, разъёмы, трассу кабеля и оригинальный зуммер приборной панели.
Это также подходящий момент, чтобы определить, содержит ли оригинальная приборная панель небольшую вспомогательную плату, описанную ниже.
Проверьте небольшую вспомогательную плату
Некоторые оригинальные механические приборные панели более высокой комплектации содержат небольшую вспомогательную печатную плату за оригинальным дисплеем. Она присутствует не на каждой панели Lavida.
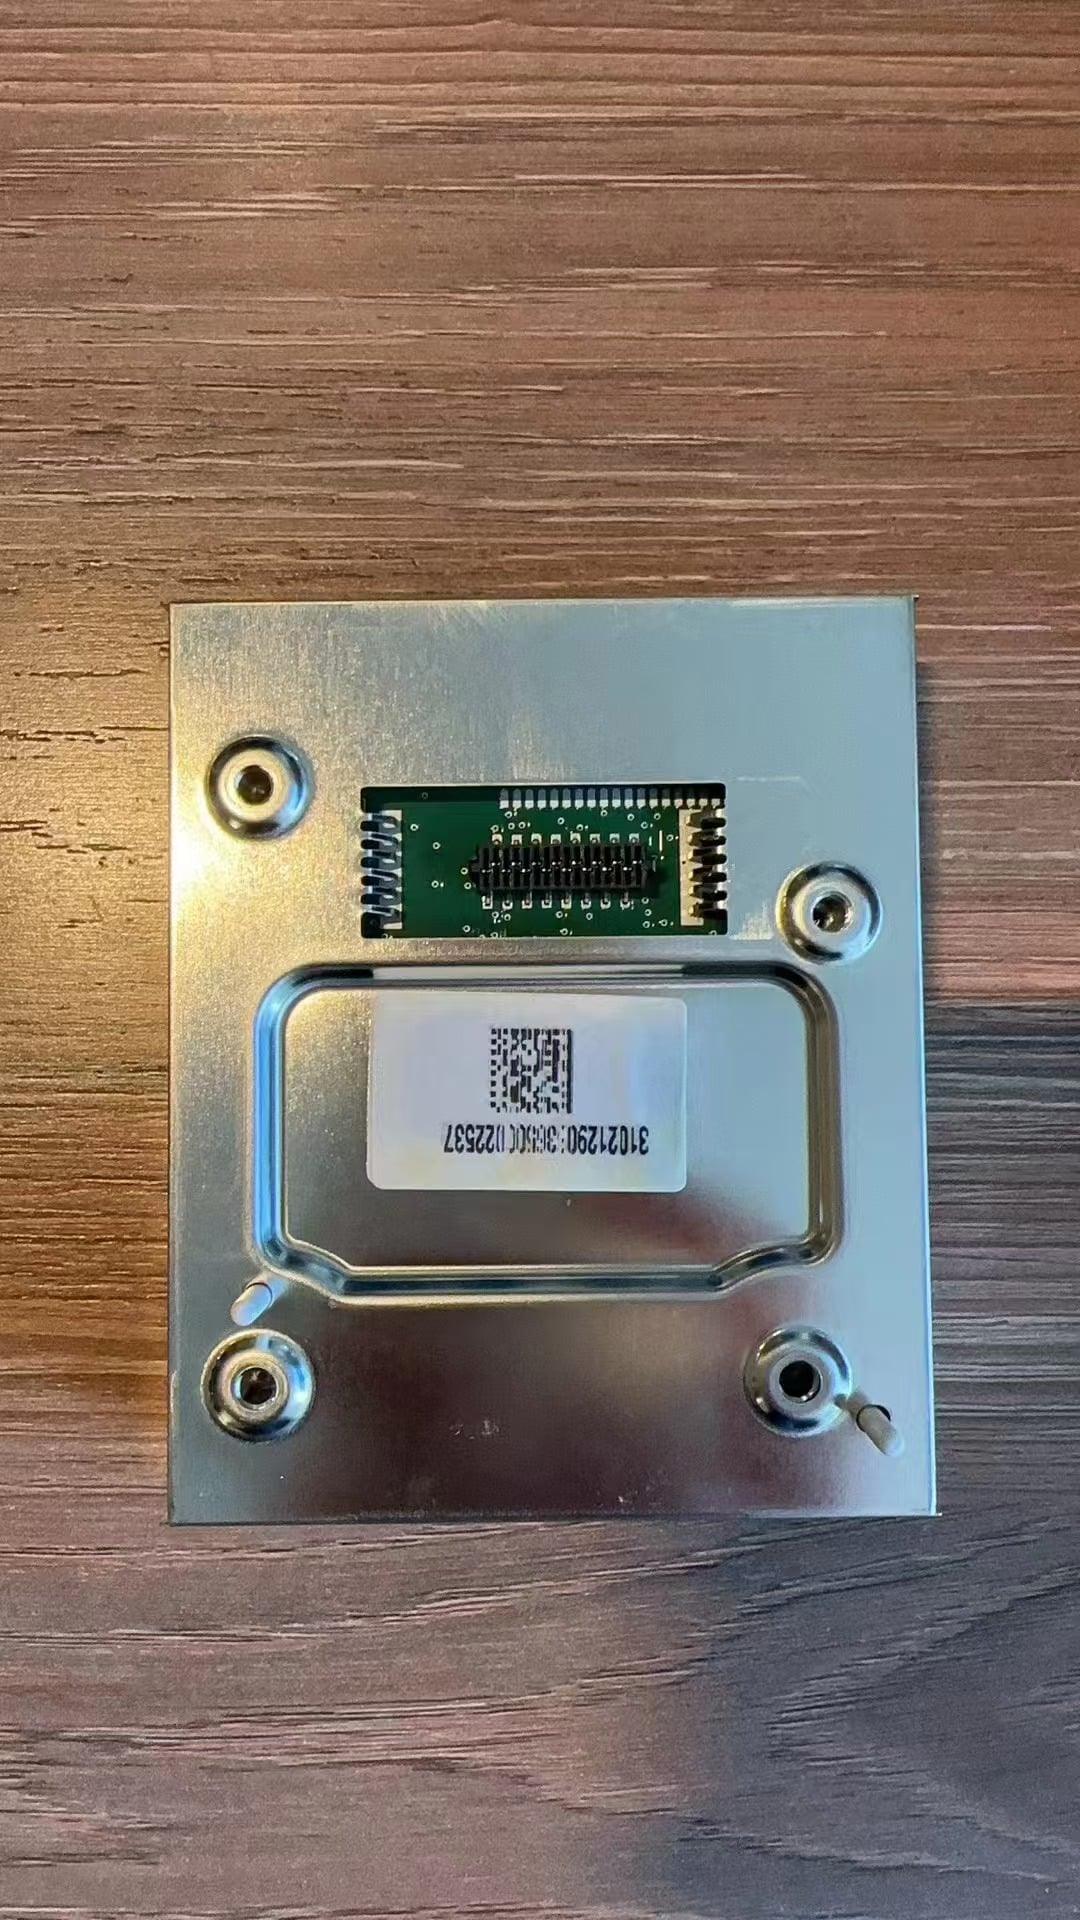
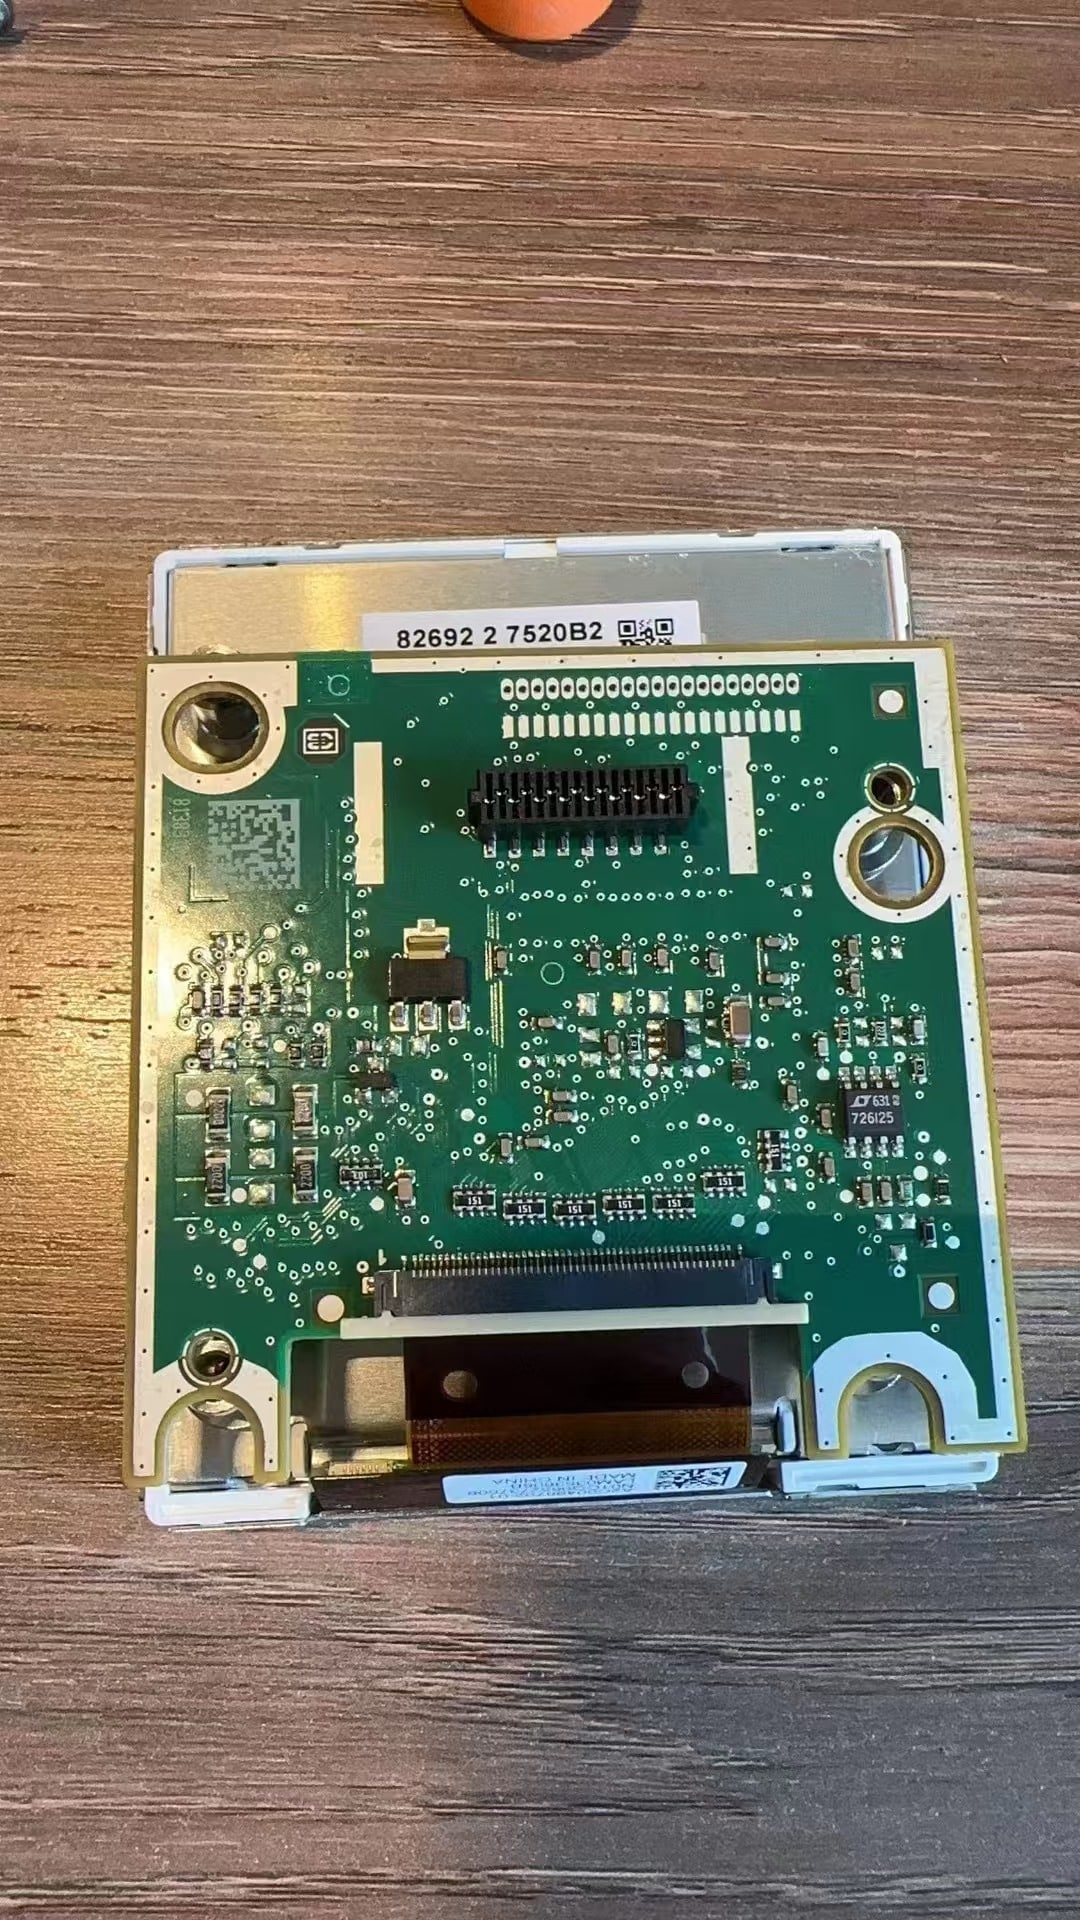
Если оригинальная приборная панель содержит эту плату, перенесите и надёжно закрепите её. Если оригинальная приборная панель не содержит эту плату, установка вспомогательной платы не требуется.
Критическая проверка: если оригинальная приборная панель содержит эту плату, её отсутствие или ненадёжное крепление может привести к ошибкам уровня топлива или предупреждениям о неисправности приборов.
Пояснение по вспомогательной плате
Изображение установки вспомогательной платы
Сборка цифровой приборной панели и прокладка USB
После проверки сохранённой электроники соберите цифровую приборную панель и подготовьте её к установке обратно в приборную панель автомобиля.
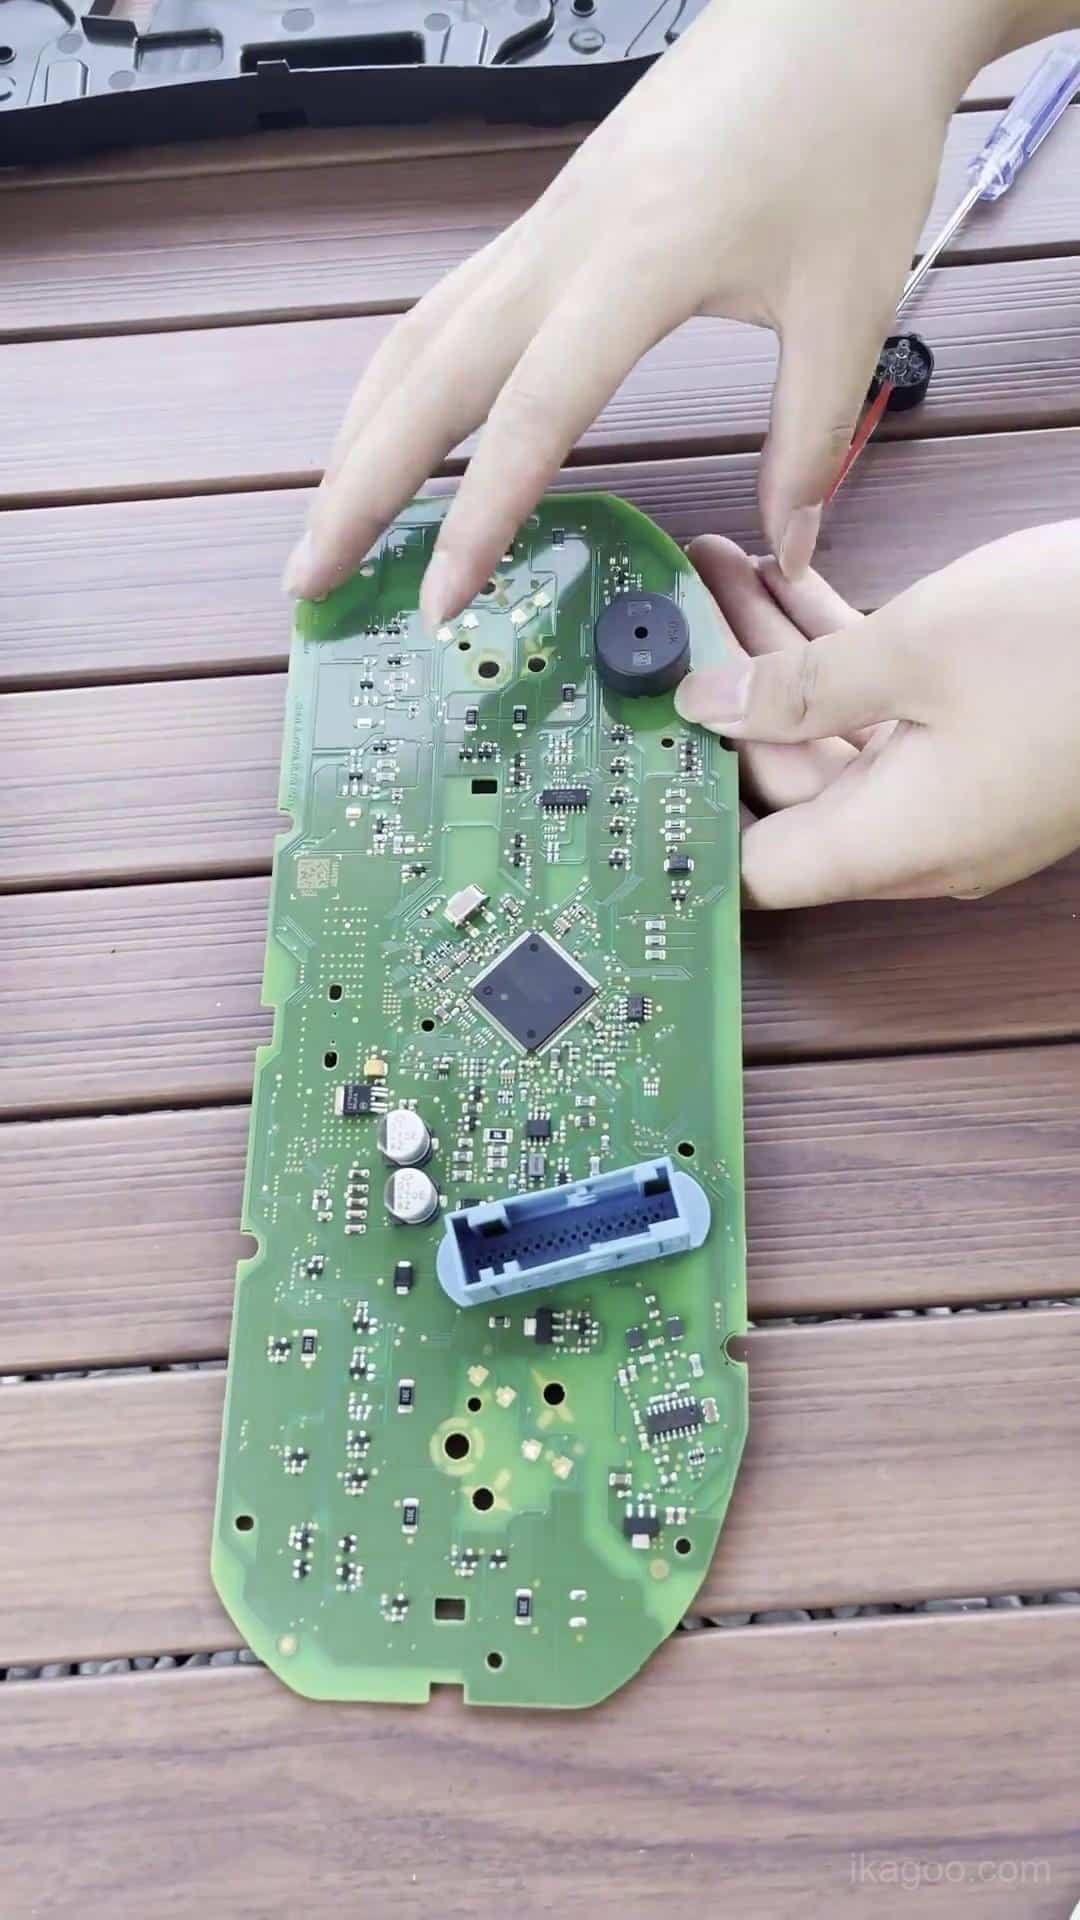
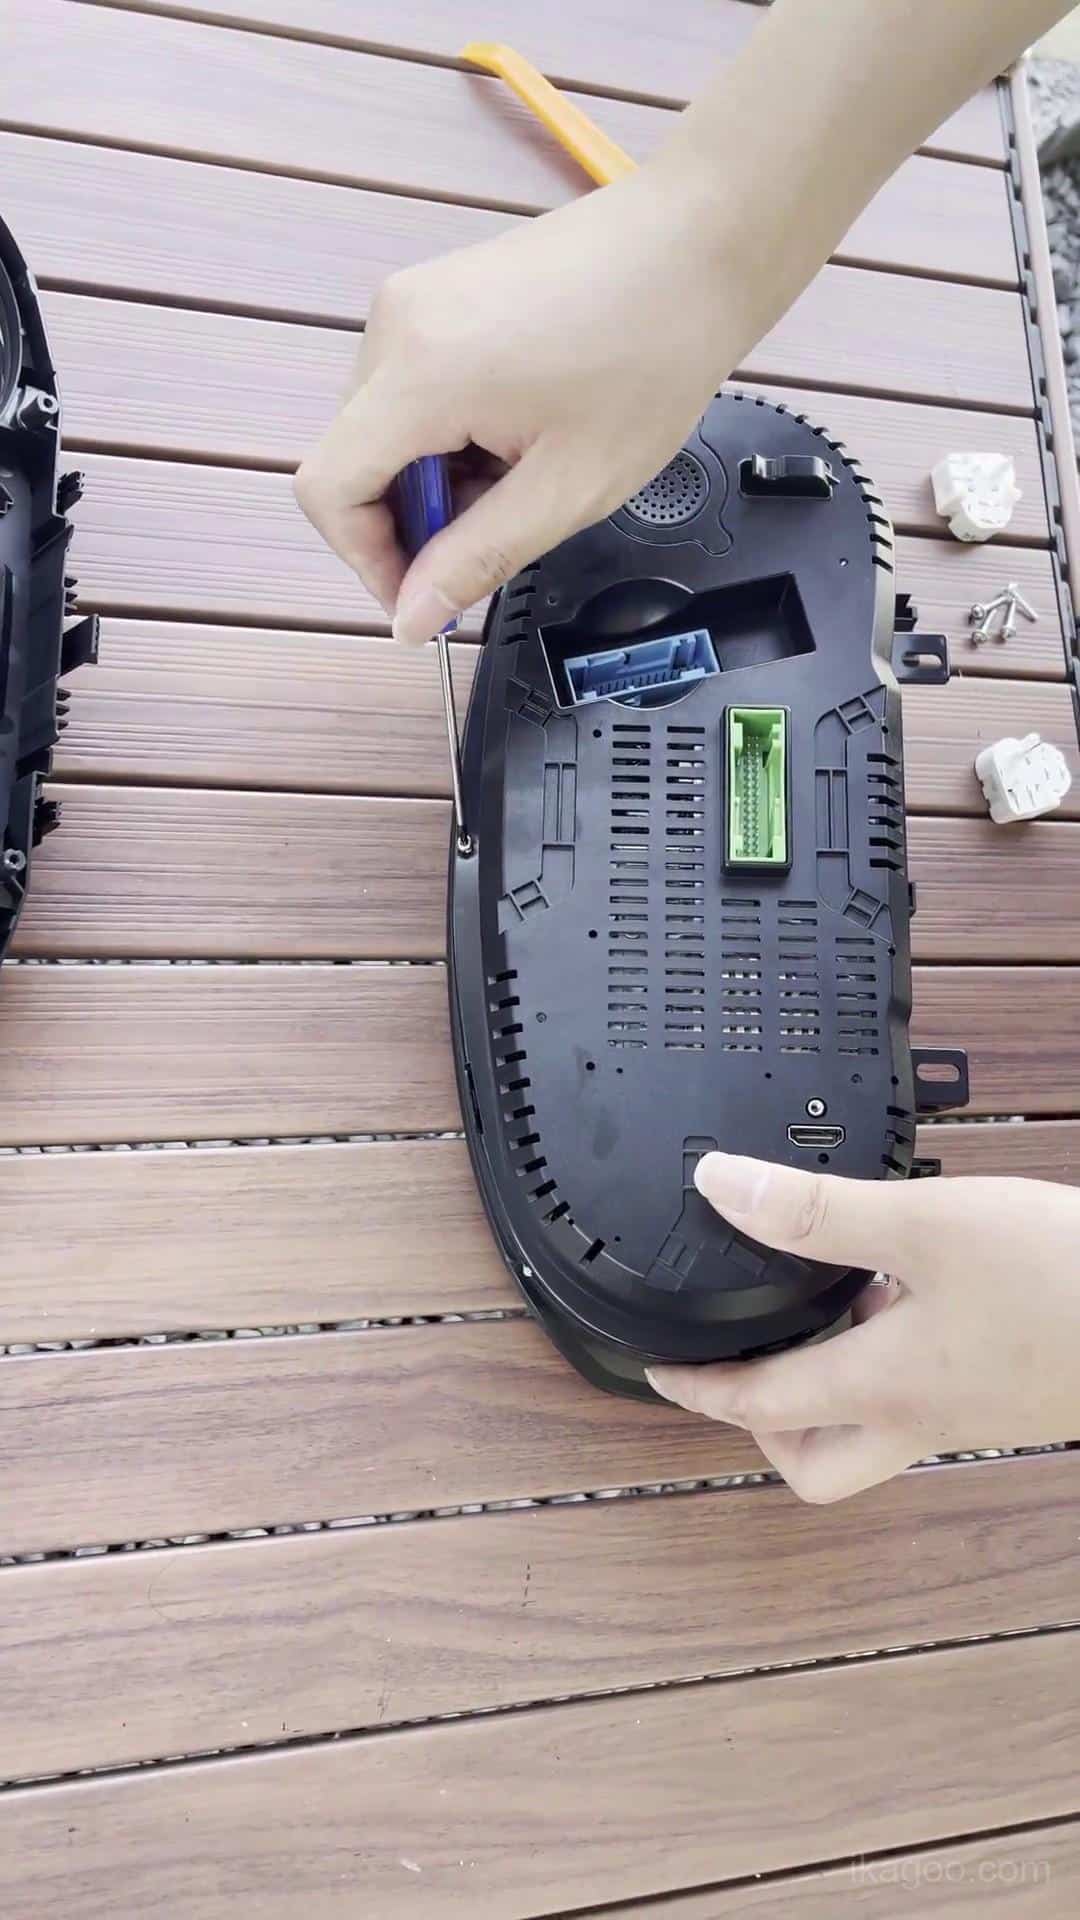
Шаг 11. Соберите цифровую приборную панель
Закройте корпус равномерно по периметру. Нажимайте только на структурные края корпуса и никогда не нажимайте непосредственно на поверхность ЖК-дисплея.
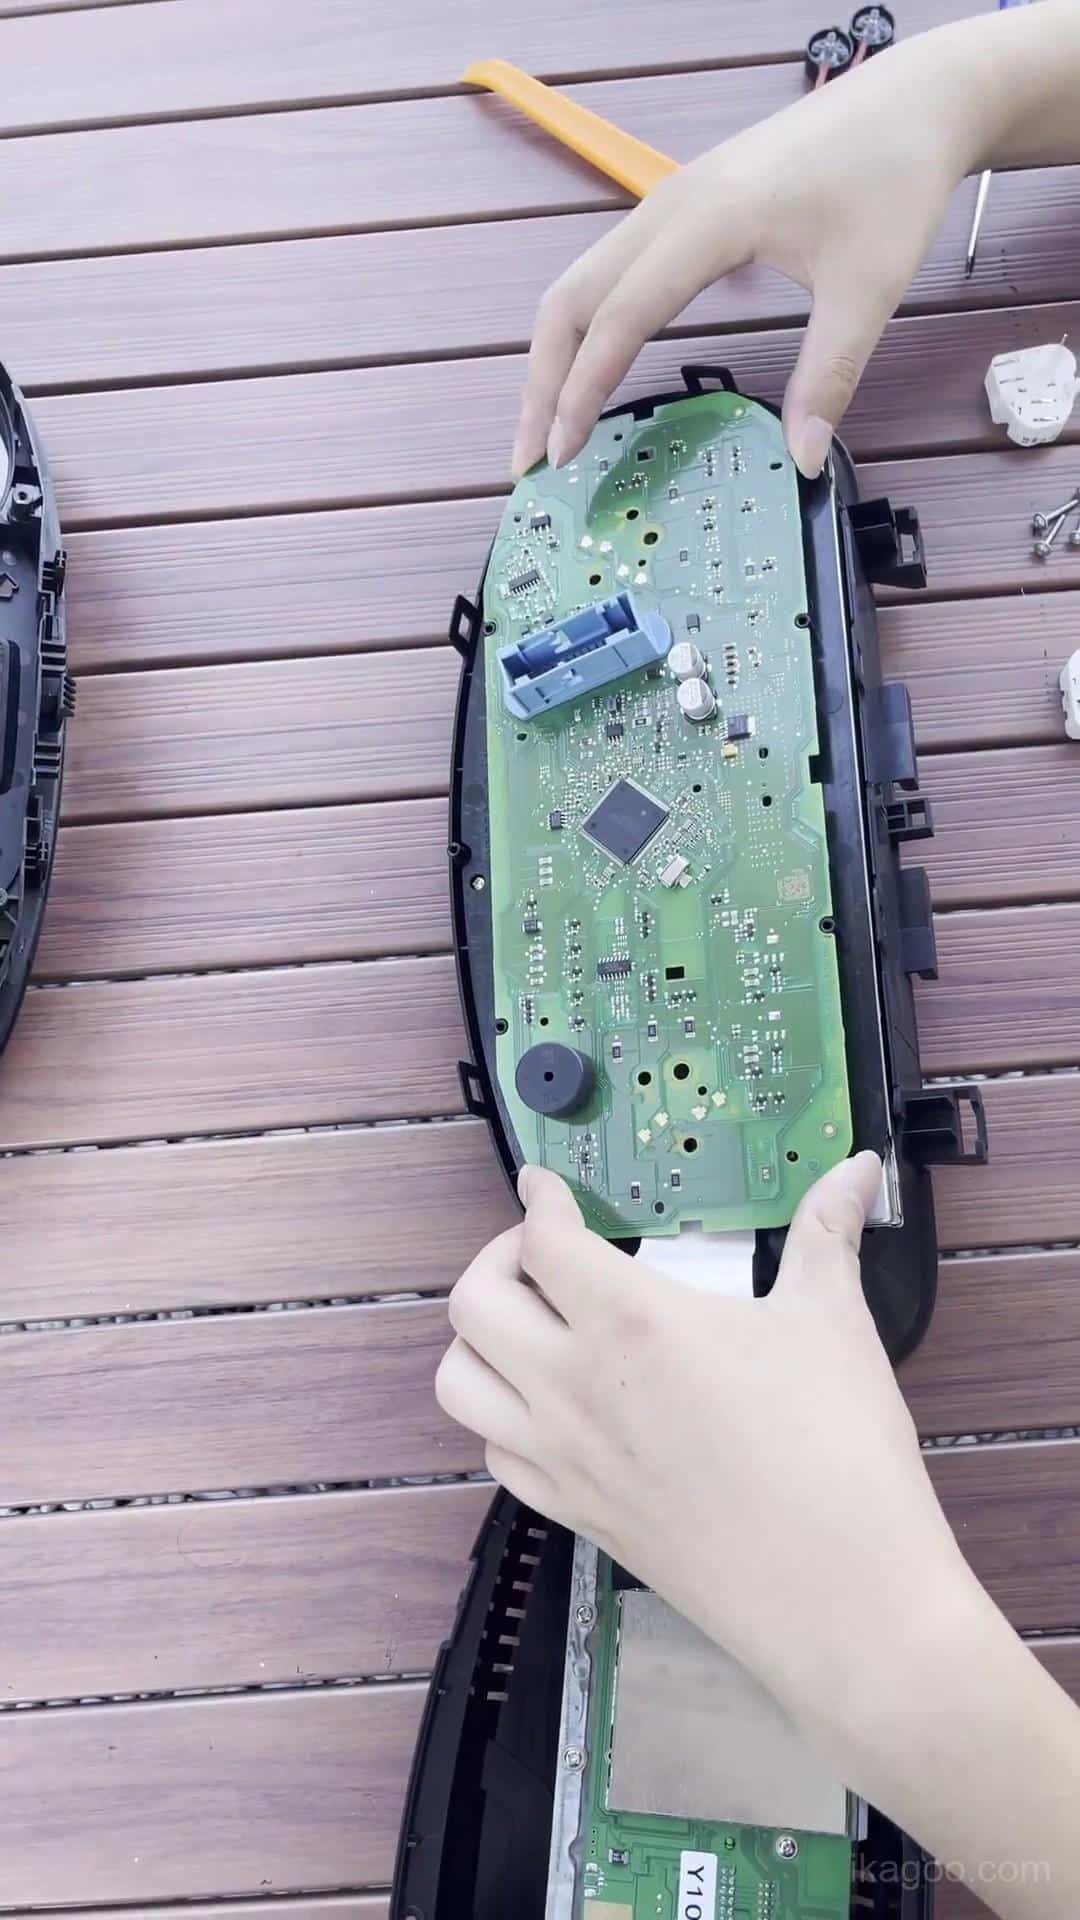
Шаг 12. Осмотрите собранный корпус приборной панели
Проверьте весь стык корпуса и убедитесь, что сохранённая электроника, зуммер, шлейфы и кабели остаются правильно расположенными.
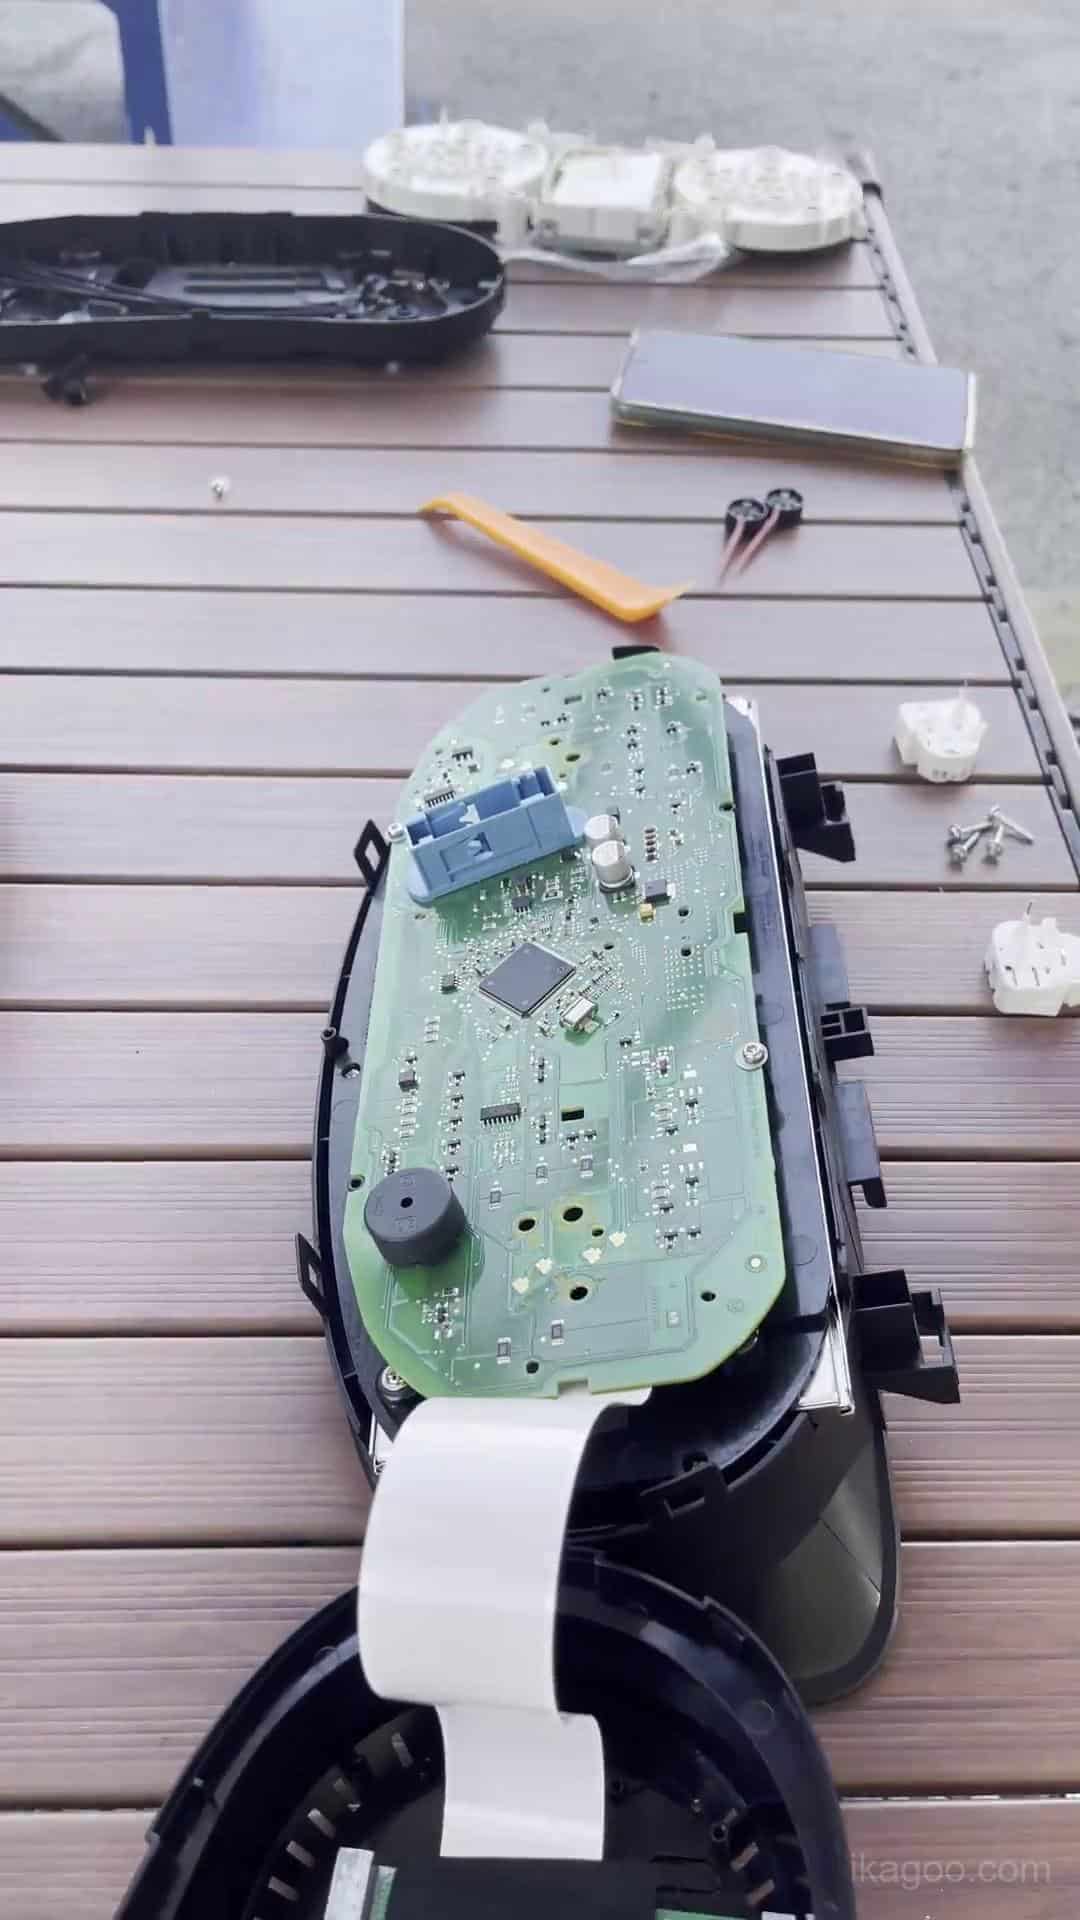
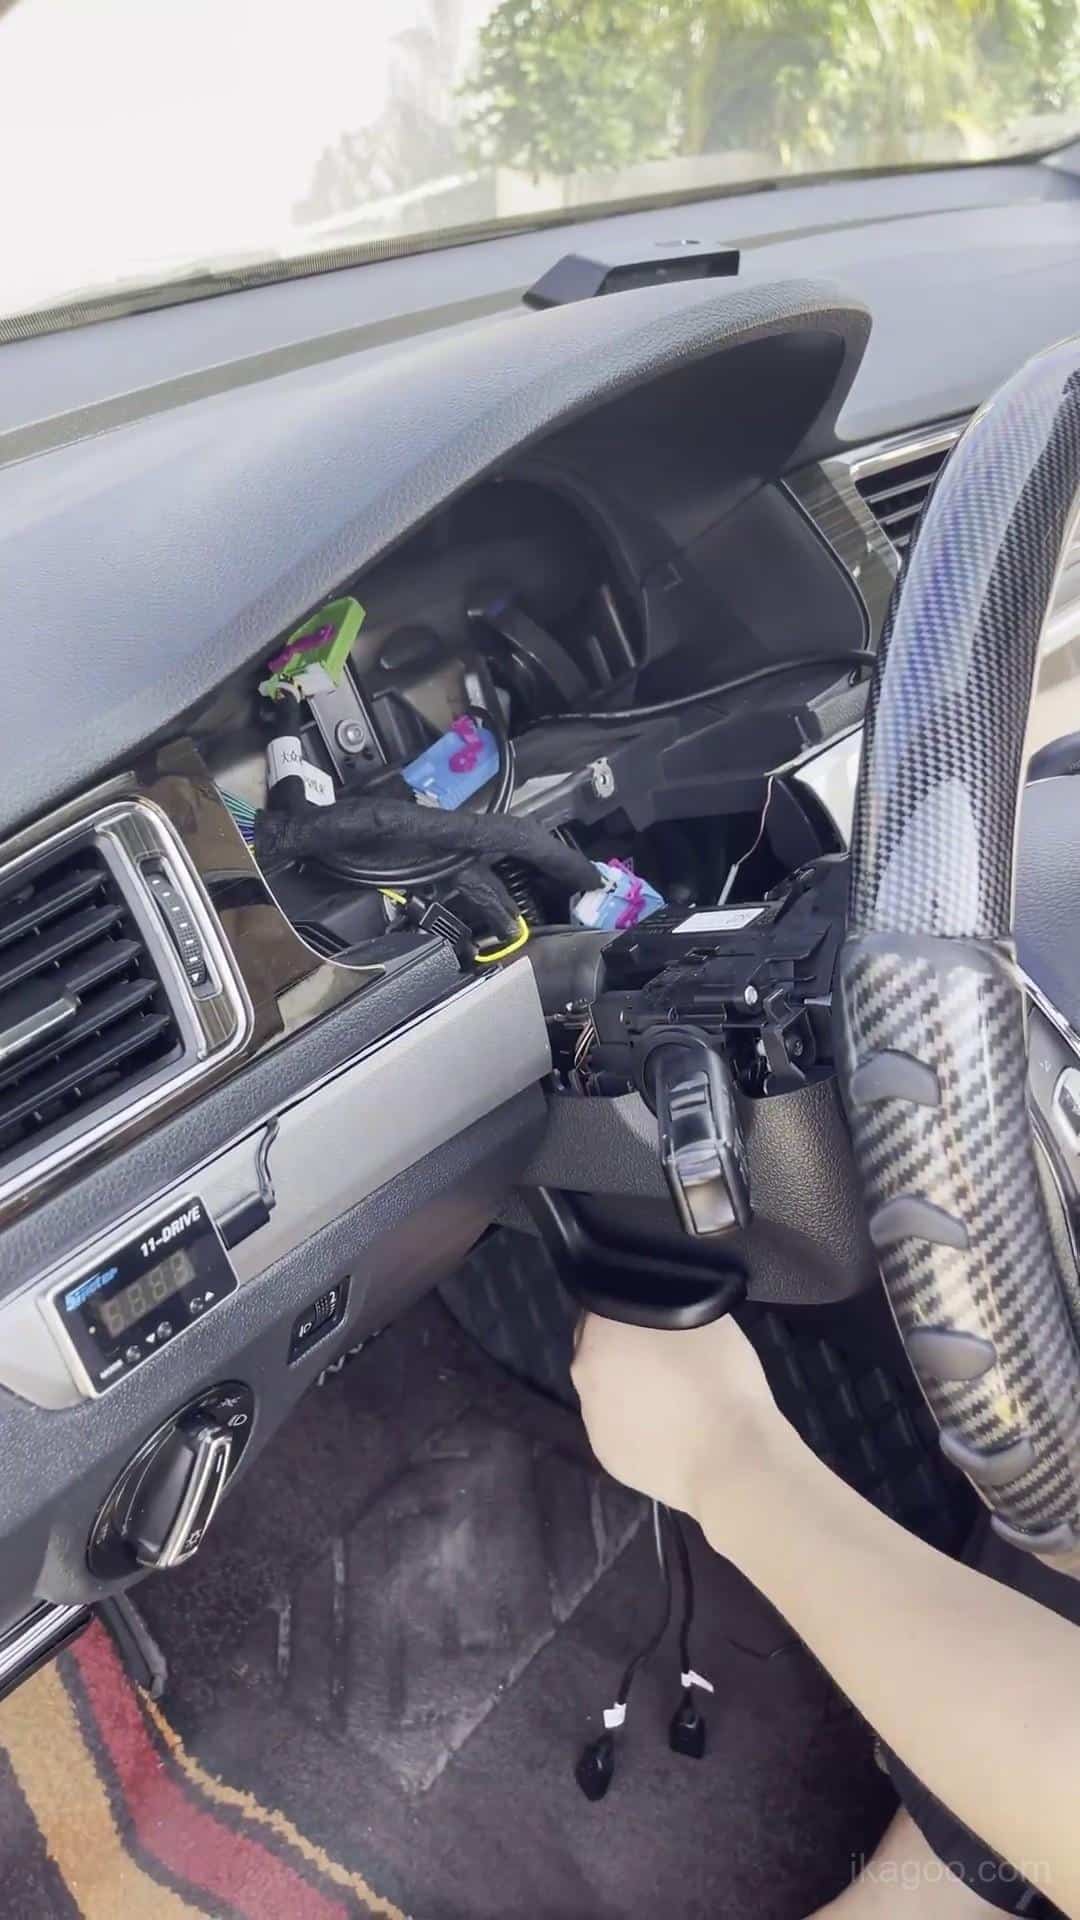
Шаг 13. Подключите цифровую приборную панель
Полностью подключите оригинальный жгут проводов автомобиля и разместите модернизированную приборную панель внутри проёма приборов. Оставьте окружающую отделку открытой для первого теста включения.
Шаг 14. Проложите оба USB-кабеля
Оставьте оба USB-кабеля доступными рядом с нижним левым отсеком для хранения под рулевым колесом.
Один кабель сохранён для доступа к проводному обновлению программного обеспечения. Другой используется для проводного проецирования, если это поддерживается поставленной версией приборной панели.
Первое включение и окончательная установка приборной панели
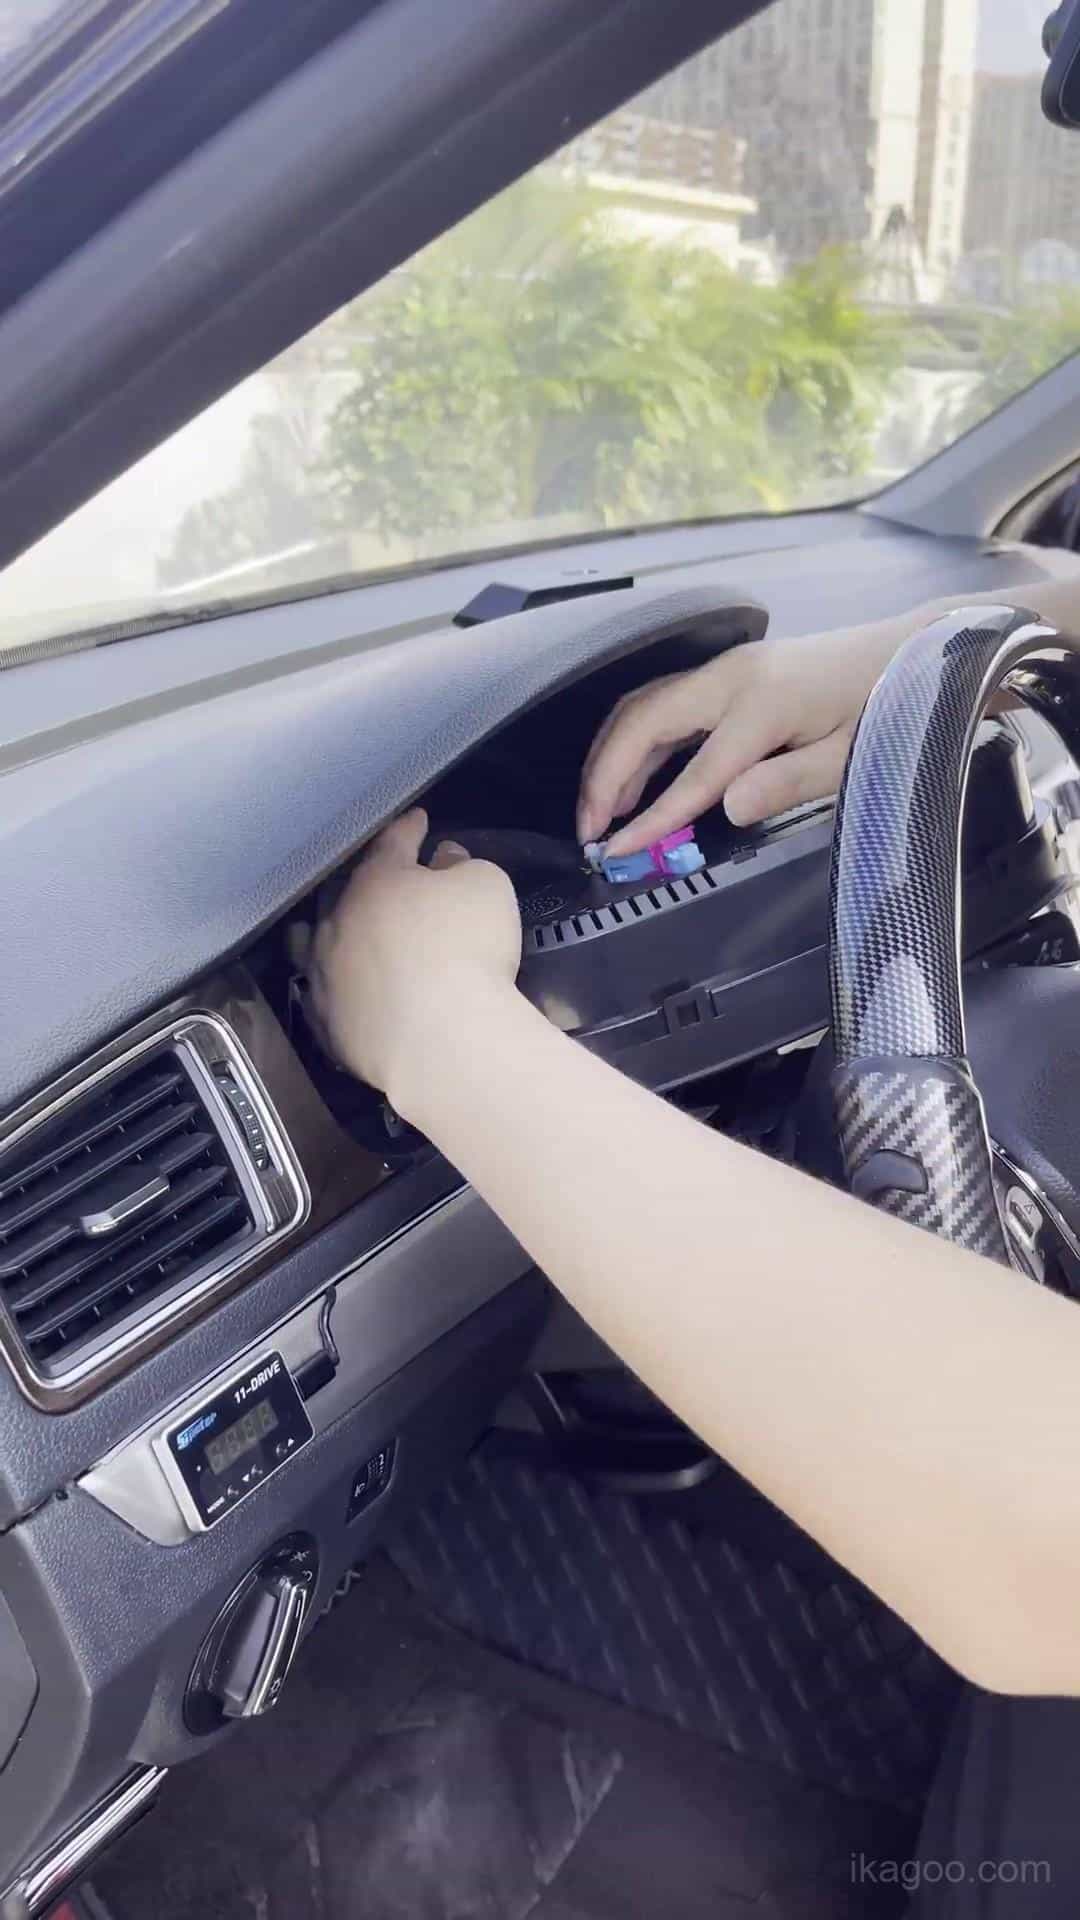
Не устанавливайте все декоративные накладки приборной панели до тех пор, пока комбинация приборов не пройдёт тест первого включения.
Шаг 15. Включите питание и проверьте цифровую комбинацию приборов
Проверьте запуск, поведение предупреждений и основной дисплей данных автомобиля. Осмотрите ЖК-экран на наличие аномальных линий, тёмных участков или следов давления.
Шаг 16. Установите на место окружающие декоративные накладки приборной панели
После успешного прохождения теста первого включения выровняйте накладку и устанавливайте её постепенно. Если требуется необычное усилие, сначала проверьте положение комбинации приборов и прокладку кабелей.
Шаг 17. Проверьте окончательную установку
Проверьте готовую приборную панель с места водителя. Убедитесь в чистоте установки, нормальном запуске, работе индикаторов предупреждений, отображении топлива, отображении указателей поворота, работе меню и общем поведении информации об автомобиле.
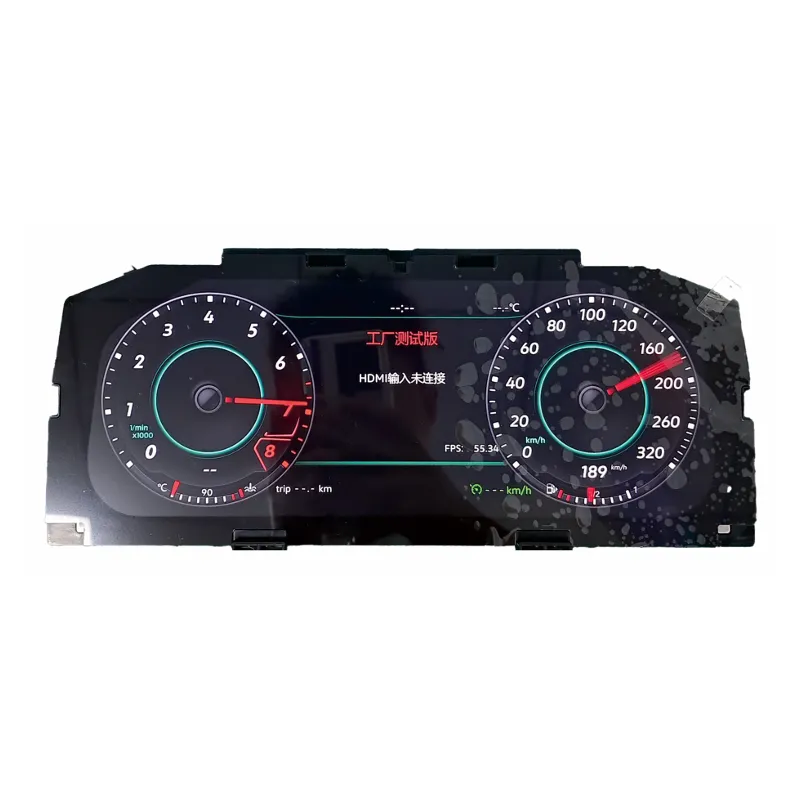
Цифровая комбинация приборов для Volkswagen Lavida 2013-2017
Это маршрут продукта цифровой комбинации приборов iKAGOO, связанный с показанным выше способом установки. Он предназначен для совместимых применений Volkswagen, использующих поддерживаемую оригинальную архитектуру комбинации приборов.
Не заказывайте, ориентируясь только на год выпуска. Перед отправкой оригинальную приборную панель и комбинацию приборов следует проверить на соответствие поддерживаемому маршруту.
Калибровка и настройки после установки
Калибровка емкости топливного бака
Если указатель уровня топлива не отображает полный бак после заправки: проверьте калибровку, прежде чем предполагать аппаратную проблему.
- Полностью заполните топливный бак.
- Проедьте несколько сотен метров.
- Открыть Данные о вождении → Объем дозаправки.
- Считайте отображаемое значение доступного для заправки объёма.
- Открыть Настройки → Калибровка конфигурации → Объем топливного бака.
- Введите отображаемое значение доступного для заправки объёма.
- После правильной калибровки значение доступного для заправки объёма должно вернуться к 0.
Настройка физического света
На соответствующем маршруте Volkswagen Lavida PQ параметр «Физический свет» должен оставаться отключённым. Неправильное включённое состояние может повлиять на поведение отображения указателей поворота.
Выбор модели автомобиля
Если изображение автомобиля, отображаемое внутри комбинации приборов, не соответствует реальному автомобилю, используйте настройку выбора модели автомобиля, выберите правильную модель, выключите автомобиль и заблокируйте его на несколько минут, прежде чем проверять снова.
Устранение неисправностей цифровой комбинации приборов Volkswagen Lavida
Указатель уровня топлива не показывает полный бак
Сначала проверьте: выполните калибровку объёма топливного бака, используя значение Refillable Amount.
Индикация указателей поворота отображается неправильно
Сначала проверьте: убедитесь, что Physical Light отключён на соответствующем маршруте PQ.
Появляется предупреждение о неисправности прибора
Сначала проверьте: убедитесь, что сохранён оригинальный зуммер и вспомогательная плата, если оригинальная комбинация приборов включала её.
Отображается неправильное изображение автомобиля
Сначала проверьте: выберите правильную модель автомобиля, выключите автомобиль и заблокируйте его на несколько минут.
USB-кабель недоступен в дальнейшем
Сначала проверьте: оба USB-кабеля должны оставаться доступными рядом с нижним левым отсеком для хранения.
Цифровая комбинация приборов не запускается
Сначала проверьте: проверьте оригинальный разъём автомобиля и установку сохранённой платы.
На ЖК-дисплее есть полосы или следы давления
Сначала проверьте: проверьте корпус и ЖК-дисплей. Никогда не нажимайте непосредственно на дисплей во время повторной сборки.
Комбинация приборов установлена неправильно
Сначала проверьте: проверьте положение корпуса, прокладку USB-кабеля и окружающую отделку панели приборов.
Финальный контрольный список установки
Аппаратная часть
- Оригинальная плата установлена правильно
- Оригинальный зуммер сохранён
- Вспомогательная плата перенесена, если присутствовала изначально
- Нет зажатых шлейфов или кабелей
- На ЖК-дисплей не оказывается давление
Работа автомобиля
- Комбинация приборов запускается нормально
- Предупреждающие индикаторы проверены
- Индикация топлива проверена
- Указатели поворота проверены
- Элементы управления меню проверены
Конфигурация
- Калибровка топлива выполнена при необходимости
- Настройка Physical Light проверена
- Проверена графика автомобиля
Поддержка в будущем
- Оба USB-кабеля доступны
- Сфотографирован экран программного обеспечения/версии
- Сфотографирована окончательно установленная приборная панель
Рекомендуется: сохраните четкую фотографию экрана программного обеспечения/версии после установки. Это поможет определить точную установленную версию, если потребуется будущее обновление или техническая поддержка.
Связанные ресурсы iKAGOO
Продукт Volkswagen Digital Cluster
Ознакомьтесь с продуктом, связанным с этим маршрутом установки.
Просмотреть Digital Cluster →Руководство пользователя VW и Audi Digital Cluster
Используйте руководство для работы, настроек и поддерживаемых рекомендаций после установки.
Открыть руководство пользователя →Библиотека руководств по установке
Просмотрите дополнительные руководства по установке iKAGOO для конкретных автомобилей.
Просмотреть руководства по установке →Нужен Digital Cluster, использованный в этой установке на Lavida?
Отправьте ваш Volkswagen Lavida 2013-2017 года выпуска, а также четкие фотографии оригинальной приборной панели и комбинации приборов, чтобы конфигурацию можно было проверить перед отправкой.
Часто задаваемые вопросы по установке Digital Cluster на Volkswagen Lavida 2013-2017
Подходит ли цифровая комбинация приборов для каждого Volkswagen Lavida 2013-2017?
Нет. Оригинальная механическая комбинация приборов и архитектура приборной панели должны соответствовать поддерживаемому маршруту установки на платформе PQ.
Требует ли установка цифровой комбинации приборов на Volkswagen Lavida 2013-2017 резки проводов?
На поддерживаемом маршруте установки резка проводов или сращивание жгута проводов не требуются. Снятие приборной панели и перенос оригинальных электронных компонентов по-прежнему необходимы.
Что необходимо сделать перед снятием оригинальной комбинации приборов Lavida?
Завершите подготовку меню предупреждений, пока оригинальная механическая комбинация приборов еще установлена, включая описанные выше настройки предупреждений о зимних шинах и ограничении скорости.
Нужно ли переносить оригинальную приборную плату?
Да. Необходимые сохраняемые оригинальные электронные компоненты должны быть перенесены и правильно установлены внутри модернизированной цифровой комбинации приборов.
Есть ли в каждом Volkswagen Lavida небольшая вспомогательная плата?
Нет. В некоторых оригинальных комбинациях приборов более высокой комплектации она присутствует. Переносите плату только в том случае, если она есть в оригинальной комбинации приборов.
Почему оригинальный зуммер приборов должен оставаться установленным?
Сохраняемый зуммер является частью этого поддерживаемого маршрута установки. Его удаление может способствовать возникновению неисправностей комбинации приборов.
Почему есть два USB-кабеля?
Один обеспечивает проводной доступ для обновления программного обеспечения. Другой обеспечивает проводное проецирование там, где эта функция поддерживается поставляемой версией цифровой комбинации приборов.
Почему указатель уровня топлива не показывает полный бак после заправки?
Сначала проверьте калибровку ёмкости топливного бака. Прочитайте значение Refillable Amount и используйте его в настройке калибровки, описанной выше.
Следует ли включить Physical Light?
Нет, не на соответствующем маршруте PQ, описанном в этом руководстве. Неправильное включение может повлиять на поведение отображения указателей поворота.
Что следует проверить перед закрытием приборной панели?
Перед установкой окончательной отделки проверьте нормальный запуск, индикаторы предупреждений, отображение данных автомобиля, состояние экрана, установку сохраняемой платы и надёжность разъёмов.
Какой продукт рекомендуется для этой установки?
Используйте iKAGOO Модернизация цифровой приборной панели VW 12.3 дюймов маршрут и подтвердите оригинальную приборную панель и комбинацию приборов перед отправкой.







Add comment